https://schachenmayr.com/en/file/114737/download?token=cs–9mX0


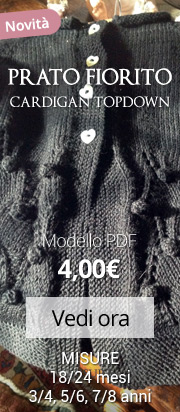
La spiegazione è per il cardigan, con un bordo svolazzante al fondo, ma potrete facilmente trasformarlo in un pullover chiuso come la foto qui sopra.
Ferri 4-5
Campione con ferri 5:
18 m per 26 ferri per 10 cm
Taglie:2-4-6-8-10-12 anni
Filato:3-4-5-6-7-8 gom
Dietro
Si inizia a lavorare dal basso del dietro direttamente dal motivo con cui verrà lavorato tutto il cardigan, alla fine verrà aggiunto il bordo finale con delle pieghe.
Con i ferri 5.00mm, montare 63 (67-71 -79-83-87) m.
Fate attenzione, che ad un aumento corrisponde sempre una diminuzione
Iniziare a lavorare il motivo:
f 1 (dir del lav): 3 dir,* 1 rov,3 dir* *ripetere fino alla fine
F 2:3 rov*1 dir,3 rov* rip .
F 3:1 dir,2 ass,1 gett,*1rov,1 gett,3 ass,1 gett* rip fino alle ultime 4 m:1 rov,1 gett,2 ass,1 dir.
F 4:2dir,*3 rov,1 dir* rip fino all’ultima m:1 dir.
f 5: 2 rov,*3 dir,1rov* rip fino all’ultima m,1 rov .
F 6 come il f 4.
f 7:2 rov*1 gett,3 ass,1 gett,1 rov* rii fino all’ultima m,1 rov.
F 8 come il f 2
Rip sempre i ferri 1-8.
Lav fino a 4 (7-1 0-1 2-1 4- 1 5) cm dall’inizio ,finendo al f 4 oppure 8
scalfi
Chiudere 3 (3-3-4-5-6) m all’inizio dei succ 2ferri … 57 (61-65-71-73-75) m.
Diminuire una maglia ai lati del ferro successivo, poi ogni due ferri fino a che avremo 51 (55-59-63-63-65) m rimaste .
Cont a lav senza dim fino a che lo scalfo misurerà 14 cm(15-16-18-18-19) finendo con un f sul rov del lav.
Spalle
Chiudere 6 (7-7-8-8-8) m all’inizio dei succ 2 ferri , poi chiudere 6 (6-7-7-7-7)m all’inizio dei succ 2 ferri.
Lasciare le 27 (29-31 -33-33-35) m in attesa.m (Su un filo di scarto o e il cavo apposito)
Davanti sinistro
Con i ferri 5.00mm montare 31 (31-35-39-39-43) m
Iniziare a lav come fatto dietro e fino alla stessa altezza. all’inizio delle diminuzioni per lo scalfo e finendo allo stesso ferro del motivo**
Scalfo
chiudere 3 (3-3-4-5-6) m All’inizio del ferro successivo … 28 (28-32-35-34-37) m.
Diminuire una maglia al bordo dello scalfo ogni due ferri fino a che resteranno 25 (25-29-31-29-32) m .
Cont a lav senza dim fino a 6 (6-7-7-7-7)cm in meno dell’inizio delle dim delle spalle nel dietro Lavorando l’ultimo ferro sul rovescio del lavoro..
Lavorare un ferro
Scollo
F succ(rl): chiudere 7 (6-7-8-7-8) m, Finire il ferro… 1 8 (19-22-23-22-24) m.
Diminuire una maglia al bordo dello scollo fino a che resteranno 1 3 (14-1 5-16- 1 7-17) m poi dim 1 m ogni 2 ferri fino a che resteranno 1 2 (13-1 4-15-1 5- 15) m.
Cont a Lavorare senza diminuzioni fino a che lo scalpo misura come il dietro all’inizio delle diminuzioni delle spalle finendo allo stesso ferro.
Spalle
Chiudere 6 (7-7-8-8-8) m all’inizio del ferro succ
Lav 1 ferro
Chiudere le restanti 6 (6-7-7-7-7) m.
Davanti destro
Lavorare come il davanti sinistro fino a **.
Lavorare un ferro.
Chiudere le restanti 6 (6-7-7-7-7) m.
Maniche
Con i ferri 4.00mm , chiudere 51 (51-55-55-55-59) m
Lavorare cinque e ferri a legaccio, cambiare con i ferri 5mm e iniziare a lavorare il motivo: lavorare come il dietro fino a circa. 4 (4-5-5-6-6)cm dall’inizio, finendo al quarto o all’ ottavo ferro del motivo.
Arrotondamento
Chiudere 2 (2-2-2-3-3) m all’inizio dei succ 2 ferri …47 (47-51 -51-49-53) m.
Diminuire una maglia ai lati del ferro successivo, poi ogni due ferri fino ha che resteranno 31 (31-35-27-23-27) m poi ad ogni ferro fino a che resteranno 9m: chiuderle.
Bordo del collo
Cucire le spalle a p materasso; con i ferri 4mm riprendere e lav al dir 1 6 (16-20-20-20-20) m dal lato ds dello scollo , lav al dir le m in attesa del dietro – (diminuendo 2 m dalle m in attesa-) poi riprendere e lav al dir 1 6 (16-20- 20-20-20) m dal lato sin dello scollo … 57 (59-69- 71-71 -73) m.
Lavorare 5 ferri a legaccio e chiudere morbidamente lavorando dritto.
Bordo davanti destro-asole
Al dir del lav e con i ferri 4.00mm riprendere e lav al dir 26 (35-38-48-48-53) m dal bordo del davanti ds,(Cominciare a riprendere le maglie dal basso del davanti destro sul diritto del lavoro)
F 1 dir
F 2:3 dir,1 gett,2 ass, * 7 dir (7-8-8-8-7), 1 gett, 2 ass, * rip fino alle ultime 3m:3 dir … 3 (4-4-5-5-6) asole fatte.
Lavorare 3 ferri a legaccio, chiudere morbidamente lavorando dritto sul rovescio del lavoro.
Bordo davanti sinistro
Al dir del lav e con i ferri 4mm riprendere e lav al dir 26 (35-38-48-48-53) m ;
lav 5 ferri a legaccio e chiudere morbidamente lavorando dir sul rov del lav.
Bordo a pieghe
Cucire i fianchi, con i ferri 4mm montare 9 m
Nota: quando girate il lav portate il fili davanti passare la m succ sul f di ds , portare il filo dietro, riportare la m sul f di sin,girare e procedere seguendo la spiegazione:avvolgendo la maglia evitate il buco che si forma quando si gira il lavoro tra una maglia e l’altra.
F 1 dir.
f 2: 7 rov,girare,7 dir
f 3:7 rov,2 dir.
f 4:2 dir,7 rov..
f 5:7 dir,girare,7 rov
F 6 dir.
I ferri da uno a sei incluso formano il motivo del volant
Continuare a lavorare fino a che il bordo a pieghe avrà la lunghezza leggermente tirato della circ della base del cardigan finendo al terzo ferro.
Finiture
Cucire le maniche, cucirle nello scalfo cucendo i raglan tra loro cucire il bordo a pieghe alla base del cardigan iniziando e finendo ai bordi dei davanti, senza i bordi
Spilla a fiore
Con i ferri quattro, montare 35 maglie, lavorare sei ferri a maglia rasata,:
f 7 *5 dir, ruotare il ferro di sinistra su se stesso,in modo antiorario fino a fare un giro completo così che il lavoro appaia rigirato*ripetere fino alle ultime 5 maglie, 5 dritti.
Ciò crea un’apparenza di bordo smerlato al vostro lavoro..
F 8 rov
F 9:1 dir,* pass 1 m,2 ass al dir, acc la m passata sui due dir (acc doppia) 2 dir* rip fino alle ultime 4 m:pass 1 m,2 ass al dir,acc,1 dir:21 m .
F 10 rov.
f 11:*acc doppia* rip fino alla fine:7 m
F 12 rov
Tagliare il filo lasciandolo lungo, con un ago passarlo nelle maglie rimaste tirare e fissare. Avvolgere il lavoro così che è un bordo si sovrapponga all’altro e formi un doppio cerchio che assomiglia a un fiore ,cucite il fiore sul davanti
.
Originale
FREE PATTERN
Design 7397A/B • Girls’s Cardigan with Pleat Trim
8th row As 2nd row.
Rows 1 to 8 incl form patt.
Cont in patt until work measures approx 4 (7-1 0-1 2-1 4- 1 5) cm from beg, ending with a 4th or 8th patt row (note 4cm has been allowed for trim worked later).
SHAPE ARMHOLES
CARDIGAN
BACK
Using 5.00mm Needles, cast on 63 (67-71 -79-83-87) sts.
Keeping patt correct, cast off 3 (3-3-4-5-6) sts at beg of next 2 rows … 57 (61-65-71-73-75) sts.
Dec one st at each end of next row, then in every foll alt row until 51 (55-59-63-63-65) sts rem.
Beg patt 1st row (right side) – K3, * P1 , K3, rep from to end.
2nd row P3, * K1 , P3, rep from * to end.
3rd row K1 , K2tog, yrn, * P1 , yon, K3tog, yrn, rep from * to last 4 sts, P1 , yon, K2tog, K1 .
Cont in patt without shaping until armhole measures 1 4 (15-1 6-18-1 8-19)cm, working last row on wrong side.
4th row K2, * P3, K1, rep from * to last st, K1.
5th row P2, * K3, P1 , rep from * to last st, P1 .
6th row As 4th row.
7th row P2, * yon, K3tog, yrn, P1, rep from * to last st, P1.
SHAPE SHOULDERS
Cast off 6 (7-7-8-8-8) sts at beg of next 2 rows, then 6 (6-7-7-7-7)
sts at beg of foll 2 rows.
Leave rem 27 (29-31 -33-33-35) sts on a stitch holder.
Copyright © 201 2 Coats PLC – http://www.knitSMC.com
All of our designs, instructions, photographs and drawings are copyright protected.
Any use beyond personal, non-commercial purposes is not permitted without our written approval.
08/201 2
LEFT FRONT
Using 5.00mm Needles, cast on 31 (31-35-39-39-43) sts. Beg patt Work in patt as for Back until work measures same as Back to beg of armhole shaping, ending with same patt row. **
SHAPE ARMHOLE
Keeping patt correct, cast off 3 (3-3-4-5-6) sts at beg of next row… 28 (28-32-35-34-37) sts.
Dec one st at armhole edge in every foll alt row until 25 (25-29-31-29-32) sts rem.
Cont in patt without shaping until armhole measures 6 (6-7-7-7-7)cm less than Back to beg of shoulder shaping, working last row on wrong side.
Work 1 row patt.
SHAPE NECK
Next row (wrong side) – Cast off 7 (6-7-8-7-8) sts, patt to end… 1 8 (19-22-23-22-24) sts.
Dec one st at neck edge in every row until 1 3 (14-1 5-16- 1 7-17)
sts rem, then in every foll alt row until 1 2 (13-1 4-15-1 5- 15) sts rem.
Cont in patt without shaping until armhole measures same as Back to beg of shoulder shaping, ending with same patt row.
SHAPE SHOULDER
Cast off 6 (7-7-8-8-8) sts at beg of next row. Work 1 row. Cast off rem 6 (6-7-7-7-7) sts.
RIGHT FRONT
Work as for Left Front to **. Work 1 row patt.
Cast off rem 6 (6-7-7-7-7) sts.
SLEEVES
Using 4.00mm Needles, cast on 51 (51-55-55-55-59) sts. Knit 5 rows garter st (1 st row is wrong side).
Change to 5.00mm Needles and beg patt. Work in patt as for Back until work measures approx 4 (4-5-5-6-6)cm from beg, ending with a 4th or 8th patt row.
SHAPE TOP
Keeping patt correct, cast off 2 (2-2-2-3-3) sts at beg of next 2 rows… 47 (47-51 -51-49-53) sts.
Dec one st at each end of next row, then in every foll alt row until 31 (31-35-27-23-27) sts rem, then in every row until 9 sts rem. Cast off loosely.
NECKBAND
SMC recommends using Mattress Stitch Seam.
Join shoulder seams. With right side facing and using 4.00mm Needles, knit up 1 6 (16-20-20-20-20) sts evenly along right side of neck, knit across sts from back stitch holder – dec 2 sts evenly across, then knit up 1 6 (16-20- 20-20-20) sts evenly along left side of neck… 57 (59-69- 71-71 -73) sts.
Knit 5 rows garter st. Cast off loosely knitways.
RIGHT FRONT BAND
With right side facing and using 4.00mm Needles, knit up 26 (35-38-48-48-53) sts evenly along right front edge. 1st row Knit.
2nd row K3, yfwd, K2tog, * K7 (7-8-8-8-7), yfwd, K2tog, rep from * to last 3 sts, K3 … 3 (4-4-5-5-6) buttonholes in all.
Knit 3 rows garter st. Cast off loosely knitways.
LEFT FRONT BAND
With right side facing and using 4.00mm Needles, knit up 26 (35-38-48-48-53) sts evenly along left front edge.
Knit 5 rows garter st. Cast off loosely knitways.
PLEAT TRIM
Join side seams. Using 4.00mm Needles, cast on 9 sts.
1st row Knit.
2nd row P7, turn, K7.
3rd row P7, K2.
4th row K2, P7.
5th row K7, turn, P7.
6th row Knit.
Rows 1 to 6 incl form trim patt.
Cont in patt until shorter side edge of trim fits (slightly stretched) evenly along lower edge of Back and Fronts (omitting front bands), ending with a 3rd row.
SHAPE ARMHOLE
Keeping patt correct, cast off 3 (3-3-4-5-6) sts at beg of next row… 28 (28-32-35-34-37) sts.
Dec one st at armhole edge in next row, then in every foll alt row until 25 (25-29-31-29-32) sts rem.
Cont in patt without shaping until armhole measures 6 (6-7-7-7-7)cm less than Back to beg of shoulder shaping, working last row on wrong side.
SHAPE NECK
Next row (right side) – Cast off 7 (6-7-8-7-8) sts, patt to end… 1 8 (19-22-23-22-24) sts.
Work 1 row patt.
Dec one st at neck edge in every row until 1 3 (14-1 5-16- 1 7-17) sts rem, then in every foll alt row until 1 2 (13-1 4- 15-1 5-15) sts rem.
Cont in patt without shaping until armhole measures
same as Back to beg same patt row.
Work 1 row patt.
SHAPE SHOULDER Cast off 6 (7-7-8-8-8)
of shoulder shaping, ending with
sts at beg of next row. Work 1 row.
Copyright © 201 2 Coats PLC – http://www.knitSMC.com
All of our designs, instructions, photographs and drawings are copyright protected.
Any use beyond personal, non-commercial purposes is not permitted without our written approval.
Cast off loosely.
MAKE UP
Join sleeve seams. Sew in sleeves. Sew shorter side edge of trim to Back and Front, beg and ending at front edges (omitting front bands). Sew on buttons. Sew in all ends.
FLOWER BROOCH
Using 4.00mm Needles, cast on 35 sts.
Work 6 rows stocking st.
7th row * K5, rotate the left needle anti-clockwise in a complete circle so that knitting becomes twisted, rep from * to last 5 sts, K5 this creates a scalloped appearance to your piece of knitting.
8th row Purl.
9th row K1 , * sl 1 , K2tog, psso, K2, rep from * to last 4 sts, sl 1 , K2tog, psso, K1 21 sts.
10th row Purl.
11th row * Sl 1 , K2tog, psso, rep from * to end 7 sts. 12th row Purl.
Break off yarn leaving a long end. Run end through rem sts, draw up tightly and fasten off securely.
Twist knitting so that one edge overlaps other edge forming a double circle that resembles a flower. Secure flower shape in position by sewing through base in several spots. Attach a safety pin to the back.
Top and repeat with the Front, making sure you sew matching row for row. Lastly, join the side and sleeve seams (see diagram below).
SEWING RAGLAN SLEEVES
A raglan sleeve is one where the armhole and sleeve top are shaped with a diagonal slant up to the neckline. Usually the top of the sleeve forms part of the neckline.
Some raglans are fully fashioned. This means that the decreases are worked one or more stitches in from the side edge of the work. This leaves a neat edge to follow for sewing up your garment.
SMC recommends using safety pins to join seams. Using a wool needle and Mattress Stitch Seam, join seams of garment Back above armhole to Sleeve
Copyright © 201 2 Coats PLC – http://www.knitSMC.com
All of our designs, instructions, photographs and drawings are copyright protected.
Any use beyond personal, non-commercial purposes is not permitted without our written approval.