
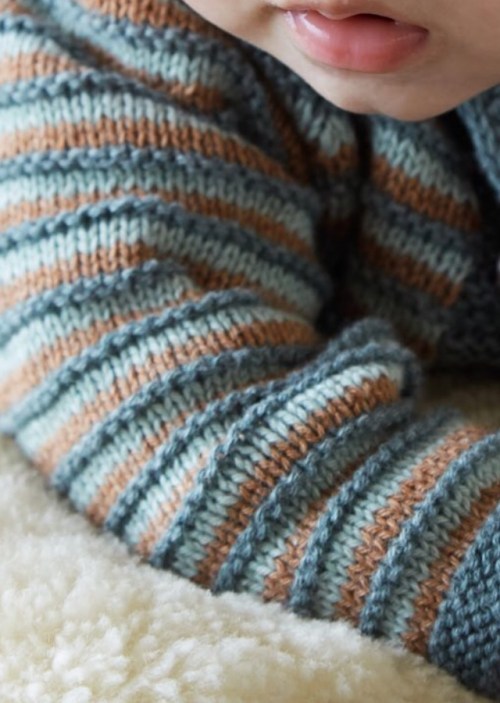
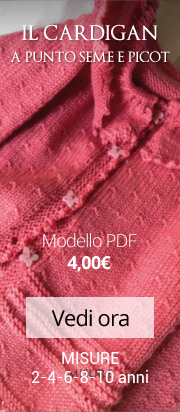
Un baby pronto per affrontare il freddo grazie alle mani amorevoli di una mamma o della nonna
Filato:
Merci by Filcolana in 3 colori:
Colour A: 100 g in colour 602 (felce verde)
Colour B: 100 g in colour 610 (zenzero marroncino)
Colour C: 50 g in colour 1390 (Salvia azzurro)
– Il pantalocino si lavora con il colore B.
Ferri
2,5 mm e 3 mm circolari
6 (6) 7 bottoncini
Taglie
3 (6 ) 9-12 mesi
Misure
Cardigan, circ busto: 50 (54) 58 cm
campione
28 m a m rasata e ferri 3 mm = 10 cm
Righe
F 1 (dl): dir con B.( marrone)
F 2 (rl): rov con B.( marrone)
F 3: dir con C.(azzurro)
F 4: rov con C.(azzurro)
F 5: dir con A.( verde)
F 6: dir con A.( verde)
Rip questi 6 ferri
Abbreviazioni
pm: piazzare un marker
M1: aum intercalare
acc: dimInuire una m : passare 1 m,1 dir,accavallare la m passata sul dir
Vivagno ( o cimosa): si passa la prima m di ogni ferro al dir e l’ultima m di ogni ferro si lavora al dir
Per lav i ferri accorciati, si passa una m e si gira e al f succ per chiudere il buchetto della girata si lav la m passata assieme al filo di fianco alla m
Link al l’originale:
http://www.filcolana.dk/sites/default/files/HP_BertramEN2.pdf
CARDIGAN
Corpo ( il cardigan si lavora tutto assieme cominciando dal basso)
Montare 146 (158) 170 m con i ferri 2,5 mm e il col A.
Lav in avanti e indietro .
Passare sempre le prime due maglie al rovescio (con il filo tenuto davanti) e le ultime due maglie al dritto (sia al diritto del lavoro che al rovescio del lavoro) per formare un bordo di vivagno di due maglie.
Mettere i marker ai fianchi in questo modo:
Lavorare le prime sei maglie al dritto (il bordo del davanti), lavorare le successive 32 maglie (35-38) per il davanti destro,pm, lav al dir le succ 70 (76) 82 m per il dietro,pm, lav al dir le succ 32 (35) 38 m per il davanti sin ,e lav la dir le ultime 6 m del bordo .
Asole
Lavorare un asola sul bordo del davanti destro dopo i primi quattro ferri al dir,in questo modo: passare le prime due maglie a rovescio, 2 ass al dir,un doppio gettato,1 acc.
Al f succ lav 1 dir,1 dir ritorto nei due gettati .
Dopo 8 ferri mettere le 6 m dei bordi in attesa su una spilla
Cambiare con i ferri 3 e lav a righe fino a 14 (16) 18 cm.in totale.finendo con un f sul rov del lav.
Giro manica
Lav fino a 3 m prima del segnap di un fianco, chiudere 6 m, lav fino a 3 m prima del segnap succ, chiudere 3 m e finire il ferro,
Lasciamo in attesa le m del corpo mentre andiamo a lavorare le maniche .
maniche
Montare 36 (40) 44 m con i ferri 2,5 e il col A
Lav 8 ferri dir sempre lavorando una m di vivagno ai lati del ferro.
Cambiare con i ferri 3mm e lavorare a righe e allo stesso tempo aumentare una maglia ai lati del ferro ogni quattro ferri per 9 (11-13) volte in totale , in questo modo:
F sul dir del lav:1 dir, M1, dir fino all’ultima m, M1,1 dir.
Avremo 54 (62) 70 m sul ferro.
Proseguire a righe senza aumenti fino a circa. 14 (16) 18 cm.e finendo con lo stesso ferro del motivo delle righe con cui si è finito il corpo. Chiudere tre maglie ai lati del ferro successivo. Lavorare la seconda manica nello stesso modo
Sprone
Inserire le maniche ai lati del corpo dove sono state chiuse le maglie per lo scalfo e mettere un marker nei quattro punti in cui corpo e maniche si incontrano avremo un totale di 218m (246-274)
Lavorare a righe e allo stesso tempo fare le diminuzioni dei raglan a tutti i ferri sul diritto del lavoro in questo modo:*lavorare fino a tre maglie prima del marker .1 acc,2 dir (1 m della manica e 1 m del corpo),2 ass al dir*, rip da * a * altre 3 volte e finire il ferro .
Lavorare un totale di19 (21) 23 ferri con le diminuzioni . Avremo 66 (78) 90
m sul ferro
Modellare il dietro dello scollo.
Lavorare un ferro sul diritto del lavoro fino all’ultimo marker del raglan (lavorando le diminuzioni come impostato), girare al marker e lavorare indietro fino al primo marker (fino al marker del primo raglan)(passare la prima maglia al rovescio dopo aver girato). Girare ancora il marker e lavorare indietro fino a tre maglie prima dell’ultima girata. Girare e lavorare indietro fino a tre maglie prima dell’ultima girata da questa parte. Proseguire in avanti e indietro in questo modo ogni volta girando tre maglie prima della girata precedente per un totale di 3 girate per lato
Tagliare il filo e lasciare le m restanti sul ferro e lav i davanti.
Davanti
Bordo del davanti con i bottoni:(davanti sinistro )
con i ferri 2,5 e il colore A riprendere e lavorare al dritto le maglie dal davanti sinistro. Iniziando dal bordo dello scollo e finendo alle sei maglie del bordo del davanti in attesa riprendere e lavorare al dritto una maglia per ogni maglia del bordo del vivagno (Maglia Catenella) lungo il bordo. Rimettere le sei m in attesa sui ferri 2,5 e lavorarle al dritto. Ora lavorare in avanti indietro queste sei m mentre lavorate assieme al dritto l’ultima maglia di ogni ferro sul rovescio del lavoro assieme a una maglia di quelle riprese lungo il bordo del davanti (In questo modo ci sono sempre sei maglie sul ferro) continuare in questo modo fino a che tutte le maglie riprese sono scomparse. Mettere un segno per quattro (quattro-cinque) bottoni lungo questo bordo del davanti sinistro.
Bordo con le asole: (davanti destro)riprendere e lavorare al dritto le maglie lungo il davanti destro con i ferri 2,5 e il colore A. Iniziando dalle sei maglie in attesa del bordo e finendo al bordo dello scollo. Tagliare il filo
Rimettere sul ferro 2,5 le sei maglie del bordo e lavorarle in avanti indietro e allo stesso tempo lavorare assieme l’ultima maglia di ogni ferro sul diritto del lavoro con una delle maglie riprese lungo il bordo del davanti.
Lavorare le asole in corrispondenza dei segni messi dall’altro lato per i bottoni. Quando tutte le maglie riprese sono scomparse,lasciare in attesa queste 6 m.
Bordo del collo
Ora lavoriamo il bordo del collo con il colore A e i ferri 2,5. Lavorare al dritto le sei maglie del bordo del davanti destro e poi le maglie restanti dello sprone e quindi le ultime 6 maglie del bordo del davanti sinistro.
Nota: Quando incontrate le m dei ferri accorciati nel dietro, lav la m con il filo vicino che l’unisce alla m succ sollevandolo sul ferro davanti alla m
Lav 8 ferri dir facendo un’asola sul dav ds
Chiudere morbidamente, cucire le maniche e i bottoni
Nascondere i fili. Cucire le maniche a punto materasso al diritto del lavoro.
Lavare il capo con poco detersivo risciacquare asciugare l’acqua in eccesso stringendolo su un asciugamano e lasciare asciugare in piano lontano da fonti di calore e dal sole. Si può stirare al vapore
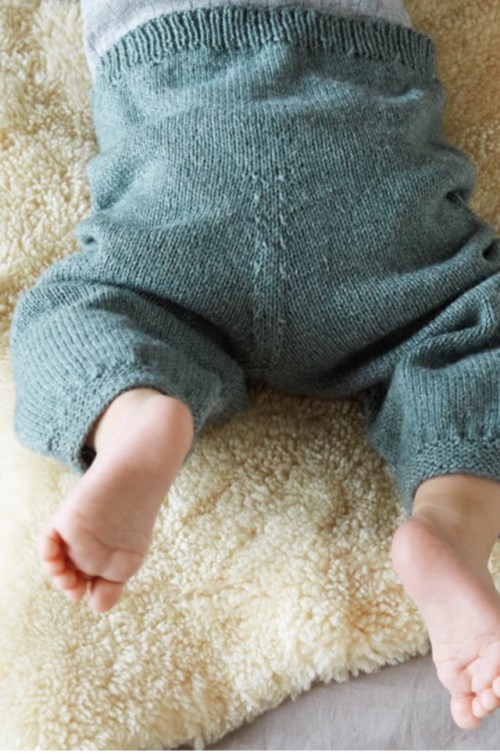
Pantaloni
Gambe
Le gambe si lavorano in avanti e indietro aperte per poi cucirle; si lasciano in attesa e si uniscono sullo stesso ferro circolare per essere lavorate in tondo mettendo un segno al centro del davanti e del dietro, ai lati del segno si faranno delle diminuzioni.
Montare 48 (52) 56 m con il col B e i ferri 2,5 mm .
Lavorare 12 ferri dritti, cambiare con i ferri circolari 3mm:
F succ (dl): viv, 1 dir, *M1, 2 dir*, rip fino alle ultime 2 m:2 dir
Proseguire diritto a maglia rasata aumentando le maglie ogni sei ferri in questo modo:
(dl):1 dir, M1, dir fino all’ultima m:M1, 1 dir
fino a 18 (20) 22 cm (o fino alla lunghezza desiderata ), poi chiudere 5 m all’inizio dei succ 2 ferri per il cavallo . Lavorare la seconda gamba allo stesso modo .
Trasferire entrambe le gambe su ferro circolare più piccolo da 3 mm e lavorare in tondo a maglia rasata su tutte le maglie. Mettere un marker al centro del davanti e del dietro e lavorare delle diminuzioni in questo modo: Lavorare fino a tre maglie prima del marker al centro,*un’acc,2 dir,2 ass*( il marker sta al centro dei due dir tra le dim), ripetere facendo le stesse diminuzioni al centro del dietro.Lavorare le diminuzioni come descritto ogni 2 giri per un totale di 5 volte, poi ogni 4 giri per un totale di sei (sei-sette) volte.
Proseguire fino a 17 (19) 21 cm Dal punto in cui le gambe si sono unite. Ora faremo dei ferri accorciati per dare rotondità al dietro: mettere un segno ai fianchi ( a metà tra dietro e davanti), lavorare fino al segno del fianco sinistro, girare il lavoro, passare la prima maglia a rovescio con il filo davanti poi lavorare al rovescio nel senso opposto fino al marker dell’altro fianco, girare il lav , passare la prima m al rov con il filo davanti Continuare a lavorare in ferie accorciati in avanti indietro come impostato fino ad avere completato tre giri in totale, tagliare il filo e iniziando da un fianco lav un giro a coste 1/1 chiudendo i buchi delle girate sollevando il filo vicino alla m sul ferro e lavorandoli assieme
Lav altri 5 giri a coste
Chiudere morbidamente e lavorando a coste.
Nascondere i fili stirare al vapore
Cucire le gambe e il cavallo a p materasso al dir del lav
Potete passare con un ago del filo elastico nel bordo a coste.
http://www.filcolana.dk/sites/default/files/HP_BertramEN.pdf
Bertram – a little sweet baby set
Design: Hanne Pjedsted
2nd English edtion – January 2021 © Filcolana A/S English translation: Signe Strømgaard
Materials
Merci by Filcolana in 3 colours:
Colour A: 100 g in colour 602 (Fern)
Colour B: 100 g in colour 610 (Gingerbread)
Colour C: 50 g in colour 1390 (Salvia)
– the trousers are worked in colour B. If the trousers are worked in colour A 150 g of this colour and 50 g of colour B is required.
2,5 mm and 3 mm circular needles
6 (6) 7 little buttons
Sizes
3 months (6 months) 9-12 months
Measurements
Cardigan, chest: 50 (54) 58 cm
Gauge
28 sts in stockinette stitch on 3 mm needles = 10 cm
Stripe pattern
Row 1 (RS): Knit with colour B. Row 2 (WS): Purl with colour B. Row 3: Knit with colour C.
Row 4: Purl with colour C.
Row 5: Knit with colour A.
Row 6: Knit with colour A. Repeat these 6 rows.
Bertram is a sweet little set for babies, wor- ked in our very soft Merci yarn. This blend of wool and cotton is brilliant for the littlest ones. Merci comes in many lovely colours, so there are lots of opportunities to play with colour combinations, even if you are knitting in com- pletely neutral tones for a future new-born.
Filcolana
Bertram
Page 2
Special abbreviations
M1: Make 1 st by lifting the chain between stitches onto the left needle and knitting it through the back loop.
Skp: slip 1 stitch, knit the next stitch, pass the slip- ped stitch over the knit stitch.
Special techniques
Selvedge stitches for seams (Selv): Slip the first stitch knit-wise with the yarn held in the back and knit the last stitch of all rows.
CARDIGAN
Body
Cast on 146 (158) 170 sts on a 2,5 mm needle with colour A. Work back and forth.
Slip the first 2 sts purl-wise with the yarn held in front, knit the last 2 sts on all rows (both RS and WS), to form a 2 stitch selvedge edge.
Place markers for side ”seams” while working the row as follows:
Knit 6 sts (front edge), knit 32 (35) 38 sts (right front), place marker, knit 70 (76) 82 sts (back), place marker, knit 32 (35) 38 sts (left front), 6 m (front edge).
Buttonholes
Work a buttonhole on the right front edge after knit- ting 4 rows as follows: Slip 2 sts purl-wise, k2tog, yarn over twice, skp. On the next row, work k1, k1 through the back loop in the two yarn overs.
Place the front edges (6 sts) at either end of the work on stitch holders after knitting 8 rows.
Change to a 3 mm needle and work in stripe pattern. Work straight in pattern until body measures 14 (16) 18 cm.
Now bind off for the armholes as follows: Work to 3 sts before marker, bind off 6 sts, work to 3 sts before next marker, bind off 6 sts, work to end of row.
Let the sts for the body rest, while the sleeves are worked.
Sleeves
Cast on 36 (40) 44 sts on a 2,5 mm needle with colour A. Knit 8 rows. Work the first and last stitch on every row as selvedge stitches for seams.
Change to a 3 mm needle and work stripe pattern as on the body. At the same time work sleeve increases every 4th row a total of 9 (11) 13 times (RS): K1, M1, knit to the last stitch, M1, k1.
There are now 54 (62) 70 sts on the needle.
Work straight in pattern until the sleeve measures ap- prox. 14 (16) 18 cm.
End on the same row of the stripe pattern as on the body.
Bind off 3 sts at the beginning and end of the next row.
Work the second sleeve the same way as the first.
Yoke
Place the sleeves over where sts were bound off for
the armholes on the body and mark the 4 places where body and sleeves meet. There are now a total of 218 (246) 274 sts on the needle.
Work back and forth across all sts in the stripe pat- tern, while at the same time working raglan decrea- ses on all RS rows as follows: *Work to 3 sts before marker, skp, k2 (1 stitch from the body and 1 from the sleeve), k2tog*, repeat from * to * 3 more times, work in pattern to end of row.
Work a total of 19 (21) 23 decrease rows. There are now 66 (78) 90 sts on the needle.
Now raise the back of the neck of the cardigan while continuing the stripe pattern as follows: Work a RS row to the last raglan marker (work decreases as established). Turn at the marker and work back to the first raglan marker (slip the first stitch purl-wise after turning). Turn again at the marker and work back to 3 sts before the last turn. Turn and work back to 3 sts before the last turn on this side. Work back and forth in this way, each time turning 3 sts before the last turn until you have turned a total of 3 times each side. Break the yarn and let the sts rest on the needle, while the front edges are worked.
Front edges
Front edge with buttons: Pick up and knit sts along the left front edge with a 2,5 mm needle and colour A. Start at the neck edge and end at the 6 front edge sts on the stitch holder, picking up and knitting 1 stitch for each selvedge edge “chain stitch” along the edge. Place the 6 sts from the stitch holder back on a 2,5 mm needle and knit across these. Now work back and forth across these 6 sts, while knitting together the last stitch on each WS row together with one of the sts that were picked up along the front edge (so there is always 6 sts on the needle). Continue in this way until all of the picked up sts have “disappeared”. Mark the placements of 4 (4) 5 buttons evenly along this left front edge.
Front edge with buttonholes: Pick up and knit sts along the right front edge with a 2,5 mm needle and colour A. Start at the 6 sts on the stitch holder and end at the neck edge. Break the yarn.
Place the 6 front edge sts on the stitch holder back on a 2,5 mm needle and knit back and forth across these sts, while knitting together the last stitch on every
RS row with a stitch together with one of the sts that were picked up along the front edge.
Work buttonholes as at the hem across from where the placement of the 5 (5) 6 buttons have been mar- ked.
When all of the picked up sts have “disappeared”, the sts are moved to the stitch holder.
Neck edge: Now work the neck edge with colour A and a 2,5 mm needle. Knit across the 6 right front edge sts, then across the resting sts from the yoke, then across the 6 sts from the left front edge.
Note: At each turn on the yoke, pick up and knit the chain between the sts together with the following
Filcolana
Bertram
Page 3
stitch to avoid little holes at the turn and to even out the ”height differences”. Kitting together the chain and the following stitch closes the little holes.
Knit a total of 8 rows, working the last buttonhole in the right front edge. Bind off without making the edge too tight.
Finishing
Weave in ends. Sew the sleeve eams with mattress stitch from the RS. Sew the buttons in where the pla- cements were marked.
Gently wash the finished work and leave it on a flat surface to dry.
TROUSERS
Trouser legs
Cast on 48 (52) 56 sts with colour B on a 2,5 mm needles. Knit 12 rows.
Change to a 3 mm circular needle.
Next row (RS): Selv, k1, *M1, k2*, repeat from * to * to the last 2 sts, k2.
Work straight in stockinette stitch, while working an increase row every 6th row as follows (RS): K1, M1, k to the last stitch of the row, M1, k1.
Continue until the leg measures 18 (20) 22 cm (or desired length), then bind off 5 sts at the beginning of the next 2 rows for the crotch. Work the second leg the same way as the first.
Top of trousers
Place the sts for both legs on a small 3 mm circular needle and work in the round in stockinette stitck across all sts. Mark the mid front and mid back, whe- re the lets meet, and work decreases as follows: Knit to 3 sts before mid front, *skp, k2, k2tog*. Repeat from * to * for mid back. Work decreases as descri- bed every other round a total of 5 times, then every 4th round a total of 6 (6) 7 times.
Continue straight until the work measures 17 (19) 21 cm from when the leg were joined. Now work short rows to raise the back of the trousers: Mark both “side seams” midway between the front and back markers. Knit to the left “side seam”, turn the work, slip the first stitch purl-wise with the yarn in front, the purl to the opposite “side seam” and turn again (slip the first stitch purl-wise with the WS turn. Conti- nue working short rows back and forth as established until a total of 3 turns have been made at both “side seams”.
Break the yarn and join it again at one of the “side seams”. Work k1, p1 rib, while closing the holes at the turns by picking up the chain between the sts onto the needle and working it together with the next stitch. Work 1 rounds of rib. Bind off in rib without tightening the yarn.
Weave in the ends. Sew the crotch seam and the leg seams with mattress stitches from the RS. Optionally sew elastic in the waist on the WS of the rib.
Gently wash the finished work and leave it on a flat surface to dry.
Filcolana


Lascia un commento