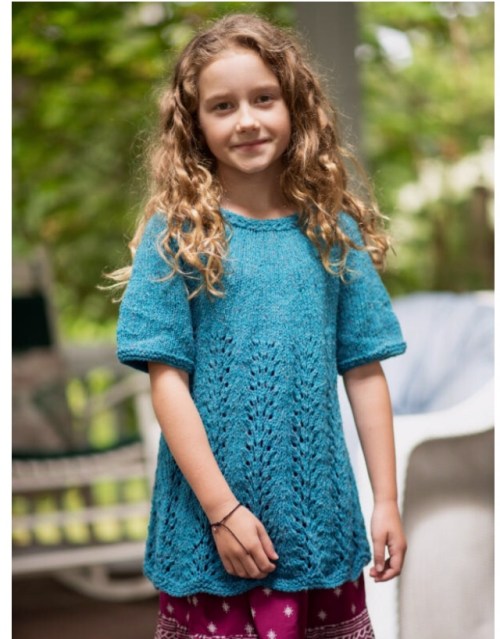
Immaginatelo rosso.. sarà perfetto per Natale
Bianco.. per una damigella ad una cerimonia
Se volete le maniche più strette al gomito , montate meno m aumentandole poi ai lati del s o del ferro se le state lavorando aperte
Oppure montatene meno e dopo 4 ferri a legaccio aggiungete quelle che mancano tutte assieme lungo il ferro per un effetto a palloncino
O ancora in una versione estiva fatele corte giusto un paio di cm prima dello scalfo
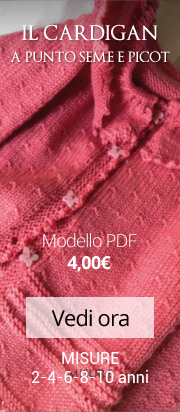
Taglie: 2-4-6-8-10 anni
Quello della foto è taglia 8 anni
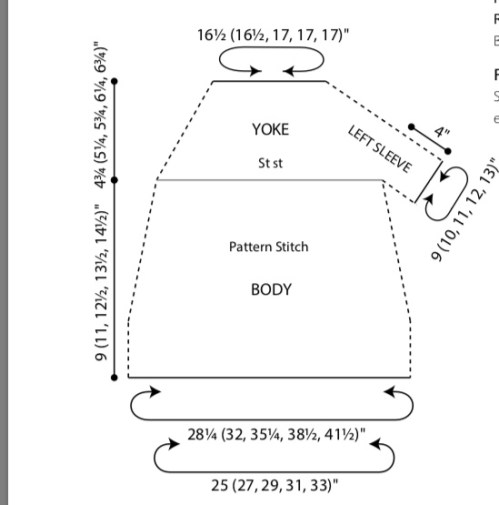
Circonferennza
63 cm(67,5-772,5-77,5-82,6)
lunghezza : 35cm ( 42-46-50-53)
Filato : BERROCO REMIX (100 grs): 2 (2, 2, 3, 3) gom col #3977 Pool
ferri circolari lunghi 80cm da (6.50 mm), (6.00 mm), (5.50 mm), e (5.00 mm),
Ferri circ lunghi 40 cm da (5.00 mm) e un 1 set di ferri a doppie punte da 5.00 mm
I ferri verranno via via cambiati iniziando dal basso verso l’alto con i più grossi poi via via più sottili
Si usano i ferri a d punte per lav le maniche, potrete usare i ferri circ corti o lunghi con la tecnica Magic Loop ( vedere su you tube); ma potrete anche lavorare le maniche con i ferri normali , aperte quindi e cucirle alla fine.
1 segnapunti (s)
2 cavi per m in attesa( o lana di scarto)
Campione
Con i ferri 5:17 m per 23 giri:10 cm
con i ferri 5,5 :17 m per 24 giri :10 cm
Con i ferri 6: 16 m per 21 giri :10 cm
Con i ferri 6,5:15 m per 20 giri:10 cm
Taglie: 2 (4, 6, 8, 10)
https://berroco.com/sites/default/files/downloads/patterns/Berroco-Hermione-v4.pdf
NOTE
Il corpo le maniche sono lavorati separatamente in tondo, poi uniti agli scalfi e si prosegue per lo sprone in tondo fino al collo.
Abbreviazioni
MB (Make Bobble: nocciolina): [1 rov,1 gett,1 rov nella stessa m – 3 m in 1
Punto traforato ( punto onda ):
Multiplo di 12 m
Giri 1-2:dir
G 3: * (lav due m ass) per 2 volte, (1 gett,1 dir) 4 volte, (2 ass) per 2 volte* rop per tutto il giro.
G 4:dir
Rip questi 4 giri per il punto onda
Spiegazione
con i ferri 6,5 montare 108 (120, 132, 144, 144) m
Mettere un s per l’inizio del giro e lav in tondo.
Lav un giro dir e un g rov per 2 volte, poi a p onda fino a 7,5 cm (9-10-12-12,5-) dall’inizio.
Cambiare con i ferri 6 e proseguire a p onda fino a 17,5 cm (17,5-20-22,5-27) dall’inizio.
Cambiare con i ferri 5,5 e proseguire a p onda fino a 22,5 cm (27,5-32-34-37) dall’inizio
Cambiare con i ferri 5.
diminuzioni : lav dir diminuendo 2 (6, 8, 12, 4) m lungo il giro —106 (114, 124, 132, 140) m rimaste
Lav un giro dir finendo 3 m prima del s
Separazione dietro davanti:
G succ: chiudere 6 m eliminando il s
Lav 47 dir (51, 56, 60, 64) per il davanti,chiudere 6 m, lav 47 dir (51, 56, 60, 64) per il dietro—Avremo 47 (51, 56, 60, 64) m sie per il dietro che per il davanti
Non tagliare il filo
Lasciare in attesa
Maniche ( farne 2)
Con i ferri a d punte montare 38 (42, 46, 50, 56) m
Mettere un s per l’inizio del giro e lav in tondo distribuendo le m su 3 ferri.
Lav un (g dir,1 g rov,1 g dir ) per due volte (6 giri a legaccio)
Poi a m rasata fino a 20 cm dall’inizio finendo a 3 m prima dell’inizio dell’ultimo giro
Scalfi: g succ: chiudere 6 m eliminando il s , dir fino slla fine: 32 (36, 40, 44, 50) m
Mettere le m in attesa.
Sprone
Nota: Quando ci saranno troppe poche m per il ferro passate ai ferri più corti
Con i ferri 5 lav al dir le 32 (36, 40, 44, 50) m di una manica, poi le 47 (51, 56, 60, 64) m del davanti, le 32 (36, 40, 44, 50) m della seconda manica, poi le 47 (51, 56, 60, 64) m del dietro — 158 (174, 192, 208, 228) m
Mettere un s per l’inizio del giro.
g di dim 1: [5 dir (4, 4, 4, 3), 2 ass] 18 (29, 18, 30, 6) volte, poi [6dir (0, 5, 5, 4), 2 ass] 4 (0, 12, 4, 33) volte—136 (145, 162, 174, 189) m
Lav 7 (8, 9, 10, 11) giri al dir.
g di dim 2: [4 dir (3, 3, 3, 2), 2 ass] 18 (5, 18, 30, 6) volte, poi [5 dir (4, 4, 4, 3), 2 ass] 4 (20, 12, 4, 33) volte—114 (120, 132, 140, 150) m. Lav 7 (8, 9, 10, 11) giri dir.
g di dim 3: [3 dir(2, 2, 2, 1), 2 ass] 18 (5, 18, 30, 6) volte, poi [4 dir (3, 3, 3, 2), 2 ass] 4 (20, 12, 4, 33) volte—92 (95, 102, 106, 111) m
Lav 7 (8, 9, 10, 11) giri dir..
g di dim 4: [2 dir (1, 1, 1, 0), 2 ass] 18 (5, 18, 30, 6) volte, poi , [3 dir (2, 2, 2, 1), 2 ass] 4 (20, 12, 4, 33) volte—70 (70, 72, 72, 72) m.
bordo del collo: giro 1: * 1 rov, MB, * rip per tutto il giro.
G 2 rov
G succ: * 1 rov,3 ass al rov * rip per tutto il giro.
Chiudere le m lavorando rov.
finiture
Cucire i sottomanica delle maniche al corpo
Stirare al vapore
3
patternsupport@berroco.com
LEFT SLEEVE
4″
9 (10, 11, 12, 13)”
9 (11, 121⁄2, 131⁄2, 141⁄2)” 43⁄4 (51⁄4, 53⁄4, 61⁄4, 63⁄4)”
STANDARD ABBREVIATIONS & TERMS
beg: beginning
CC: contrasting color
CDD: Centered Double Decrease—Slip 2 together (as if to k2tog), knit 1, pass the 2 slipped stitches over
cn: cable needle
dec: decrease
dpn(s): double pointed needle(s)
end on WS: end having just completed a Wrong Side row. end on RS: end having just completed a Right Side row Garter St: Knit EVERY row when working back and forth in rows. Knit 1 round, purl 1 round when working in the round.
inc: increase
k: knit
k tbl: knit through the back loop(s)
k2tog: knit 2 stitches together
k3tog: knit 3 stitches together
kfb: knit in the front and back of the next st
LH: left hand
LLI: Left Lifted Increase—Insert LH needle into the purl bump one row below the st just worked on the RH needle and knit into this st (1 st inc’d)
M1: Make 1—Pick up horizontal strand between stitch just worked and next stitch from front to back, place on left hand needle, knit this stitch through the back (1 stitch increased).
M1L: Make 1 Left—Work as for M1.
M1p: Make 1 purl—Pick up horizontal strand between stitch just worked and next stitch from front to back, place on left hand needle, purl this stitch through the back (1 stitch increased).
M1pL: Make 1 purl Left—Work as for M1p.
M1pR: Make 1 purl Right—Pick up horizontal strand between stitch just worked and next stitch from back to front, place on left hand needle, purl this stitch through the front (1 stitch increased).
M1R: Make 1 Right—Pick up horizontal strand between stitch just worked and next stitch from back to front, place on left hand needle, knit this stitch through the front (1 stitch increased).
MC: main color
p: purl
p tbl: purl through the back loop(s)
p2tog: purl 2 stitches together
p3tog: purl 3 stitches together
pat(s): pattern(s)
Love Berroco patterns?
Sign up for our KnitBits® newsletter.
pm: place marker
psso: pass slipped stitch over knit stitch
rep: repeat
Rev St st: Reverse Stockinette Stitch—Purl 1 row, knit 1 row alternately when working back and forth in rows. The purl side is the right side of the work. Purl EVERY round when working in the round.
RH: right hand
RLI: Right Lifted Increase—Insert RH needle into the purl bump of the next st on the LH needle and knit into this st (1 st inc’d)
rnd(s): round(s)
RS: right side
sl: slip
sm: slip marker
SSK: Slip 2 stitches knitwise, insert point of left hand needle through fronts of these 2 stitches and knit 2 together.
SSP: Slip 2 stitches knitwise, transfer these 2 stitches back to left hand needle, purl 2 together through the back loops.
SSSK: Slip 3 stitches knitwise, insert point of left hand needle through fronts of these 3 stitches and knit 3 together.
st(s): stitch(es)
St st: Stockinette Stitch—Knit 1 row, purl 1 row alternately when working back and forth in rows. The knit side is the right side of work. Knit EVERY round when working in the round.
tbl: through back loop(s)
w&t: wrap and turn, a method of concealing a hole created in short row shaping. On RS rows: With yarn
held in front, slip next stitch purlwise, then bring yarn between needles to the back. Slip that same stitch back
to the left needle. Turn your work. On WS Rows: With
yarn held in back, slip next stitch purlwise, then bring
yarn between needles to the front. Slip that same stitch back to the left needle. Turn your work. Unless otherwise indicated, each time you come to a wrapped stitch when working subsequent rows, slip the wrap back over stitch and onto needle, then work the wrap together with its accompanying stitch.
WS: wrong side
wyib: with yarn in back
wyif: with yarn in front
yo: yarn over
Hermione
patternsupport@berroco.com
Berroco Remi
Le misure sono in inch:1 inch=2,5 cm
https://www.berroco.com/sites/default/files/downloads/patterns/Berroco-Hermione-v4.pdf


Lascia un commento