Feeds:
Articoli
Commenti

Archive for the ‘ACCESSORII’ Category

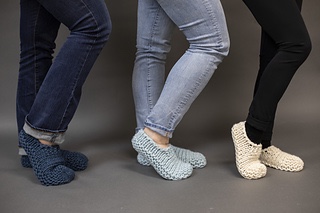
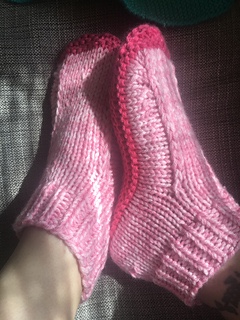
Se ci volete girare per casa consiglio di acquistare delle suolette di feltro che troverete anche online

Taglie

Donne :

Small 5-7

Medium 8-10,

Uomini:

Medium 8-10,

Large 11-13

Spiegazione

Farne 2:

Montare 17 (19, 20, 22) m

Lav 7 (9, 11, 13) ferri diritti

Primo lato della pantofola

F 1 (RL): 4(4, 5, 5)dir , rov fino alla fine del ferro

F 2 (DL): dir.

F 3: rip il f 1.

F 4: Chiudere le prime 6 (7, 7, 8) m. Dir fino alla fine del ferro . Restano 11 (12, 13, 14) m .

APERTURA

F 1 (RL): 4(4, 5, 5)dir, 4(5, 5, 6)rov, 3 dir

F 2 (DL): dir.

Rip i ferri 1-2 altre 2(3, 4, 5) volte .

F succ: 4(4, 5, 5)dir, 4(5, 5, 6)rov, 3 dir.

Montare 6 (7, 7, 8) nuove m alla fine del ferro- 17 (19, 20, 22) m in totale .

SECONDO LATO DELLA PANTOFOLA

F 1 (DL): dir.

F 2 (RL): 4(4, 5, 5)dir, poi lav al rov fino alla fine del ferro

F 3: rip il f 1.

F 4: rip il f 2.

Lav 7 (9, 11, 13) ferri dir.

Chiudere le m

FINITURE

Piegare a metà

Cucire

Girare la pantofola sul rov del lav . Nascondere i fili sul lato sinistro e tirare leggermente per formare la punta del piede ; fissare con un nodo.

Piegare il lav in due in modo che il rov del lav sia girato verso l’esterno . Cucire la suola e il tallone ; girarla nuovamente al dir.

https://www.ravelry.com/patterns/library/cloud-slippers-2

https://www.garnstudio.com/pattern.php?id=9371&cid=4

https://www.ravelry.com/patterns/library/homemade-slippers

taglie:S-M-L

FERRI 5,5-6,5

Spiegazione

Bordo caviglia a coste

Montare 40(43-46) m e lav a coste 2/1 lavorando a m rasata la prima e l’ultima m di vivagno (viv)

F 2:( viv)1 gett,2 dir,passare il gett sui due dir,1 dir* rip fino alle ultime 3 m:1 gett,2 dir,pass il gett sui due dir ,1 dir( viv)

Ferri 3-20 rip i ferri 1-2

F 21: m viv,*2 dir,1 rov* rip fino alle ultime 3 m:2 dir,viv

F 22: lav le m come si presentano

Ferri 23-38 rip gli ultimi 2 ferri

Parte superiore

Lav solo sulle 14(15-16) m centrali ora il rov del lav è il dir del lav

Rov del lav:Passare le prime 13(14-15) m e lav al dir le succ 13(14-15) m ,1 rov,girare

F2:viv: 12(13-14) dir,viv

Ferri 3-25(3-29. 3-33) rip il ferro 2

Punta

Viv,ssk,8(9-10) dir,2 ass al dir,viv

F succ:viv, 10(11-12) dir,viv

F succ:viv,ssk,6(7-8) dir,2 ass,viv

F succ:viv,8(9-10) dir viv

F succ:viv,ssk,4(5-6) dir,2 ass, viv

F succ:viv 6(7-8) dir, viv=8(9-10) m

Piede

F 1:(DL): viv,12(14-14) dir,riprendere lungo il lato destro della parte superiore 16(18-20) m e 8(9-20) m dal davanti e altre 16(18-20) m dal lato sinistro e lav al dir le ultime 12(13-14) m e il viv=66(73-80) m

Lav 9 ferri dir

Suola

F1:(DL):viv,2ass,24(28-31) dir ,2 ass,3dir,2ass,3dir,2ass , 24(28-31) dir,2ass,viv=61(68-75) m

F 2(RL): viv, dir fino all’ultima m,viv.

F 3: (DL):viv,2 ass,23(26-30) dir,2ass,3dir,2ass,3dir,2ass,22(26-29) dir,2 ass,viv=55(63-70) m

F 4 (RL):come il f 2

F 5(DL):viv,2 ass,25dir,2 ass,1 dir,2ass,1 dir,2 ass,26 dir,2 ass,viv=51(58-65) m

F6 :(RL):come il f 4

F 7 (DL):viv,2ass,24 dir,(2ass) per 3 volte,24dir,2ass,viv =46(53-60)m

F 8(RL):viv,23(25-30) dir,(2 ass,)viv

Tagliare il filo lasciandone 60 cm cucire

Taglie :S /M 15-20 cm
M/L 20-23 cm
L/XL 25-27 cm
Ferri :

5.5mm
Campione
14 m per 10 cm
A m rasata con il filo messo doppio
Abbreviazioni
  • ssk = slip, slip, knit (diminuzione di 1 m lavorando due ass al dir ritorte
  • DL = dir del lav
  • RL = rov del lav
  • PM = piazzare un marker

Suola:

Montare 47(50,52) m

F 1 dir

F 2: 1 dir,1 gett,22(23,24)dir, 1 gett,1 dir(2,2), 1 gett,22(23,24)dir,1 gett,1 dir. [51(54,56) m]
F 3 e tutti i ferri dispari : Dir.  *lav al dir ritorto i gettati del f precedente . 
F 4: 2 dir,1 gett,22(23,24)dir,- gett,, 3(4,4)dir, 1 gett,22(23,24)dir, – gett, 2 dir .  [55(58,60)m]
F 6: 3 dir 1 gett,22(23,24)dir,1 gett,5(6,6)dir, 1 gett, 22(23,24)dir, 1 gett,3 dir .  [59(62,64)m]
F 8: 4 dir,1 gett,22(23,24)dir, 1 gett,7(8,8)dir, 1 gett,22(23,24)dir, 1 gett,4 dir. [63(66,68) m]
F 10: 5 dir,1 gett,22(23,24)dir, 1 gett,9(10,10)dir, 1 gett,22(23,24)dir, 1 get,5 dy.  [67(70,72)m]
 

F 12: Solo per la taglia Sm: 6 dir,1 gett,22, 1 gett,11dir, 1 gett,22dir, 1 gett,6dir. [71m]

F 12: taglie M/L & XL : 6 dir, 1 gett , (23,24)dir, 1 gett,6dir, 1 gett,6dir, 1 gett, (23,24)dir, 1 gett, 6dir. [75,77 m]
F 13: taglie Sm & M/L andare al f 1 del piede .
              
F 13: Taglia XL: Dir  (i gettati ritorti )
  ————————

Piede

Cambiare colore.

F 1: taglia Sm solty:  (DL)  34dir, 2 ass,, 35dir. (i gettati ritorti )   [70 m]

F 1: taglia M/L soltanto : (DL) Dir (i gettati ritorti )
F 1: taglia XL soltanto : (DL) Dir.
F 2: (RL) 31(33,34)rov, PM, 8(9,9)rov, PM, 31(33,34)rov.
F 3: 24(26,27)dir, ssk per 2 volte , 3 ass al dir,8(9,9)dir , passare 1 m,2 ass, acc la m passata sulle due lavorate ass( scc doppia), 2 ass per due volte , 24(26,27)dir. [62(67,69)m) 
F 4: rov
Row 5: 20(22,23)dir, ssk 2x, 3 ass al dir , 8(9,9)dir, acc doppia , 2 ass 2x, 20(22,23)dir . 54(59,61)m]
F 6: rov
F 7: 31(34,35)dir,  ssk, girare .  [53(58,60) m]
F 8: Pass 1 m, 8(9,9)rov , 2 ass al rov ,
girare .   [52(57,59) m]
F 9: Pass 1 m, 8(9,9)dir , ssk, girare .
  [51(56,58) m] 
F 10: Pass 1 m, 8(9,9)rov , 2 ass al rov , girare .  [50(55,57) m]
Ferri 11-26: Rip i ferri 9 e 10.   [34(39,41)m]
F 27: (DL) Pass 1 m, 8(9,9)dir, ssk, NON GIRARE , 11(13,14)dir.   [33(38,40)m]
F 28: 20(23,24)rov, 2 ass al rov , 11(13,14)rov.  [32(37,39) m]
F 29: Lav un ferro eliminando i markers
F 30: Taglia Sm SOLTANTO : 1 rov,2 ass al rov, rov fino alle ultime 3 m,2 ass al rov,1 rov.    [30 m].
F 30: taglie M/L e XL SOLTANTO :  1 rov,2 ass al rov,2 ass al rov,rov fino alle ultime 5m,2 ass al rov per due volte,1 rov           [33, 35m]
F 31:  Dir
F 32:  rov

——————————- 

Bordo a coste ( qui potete cambiate colore se lo volete di colore diverso)

F 33: taglia Sm Soltanto : 1 dir,1 rov fino alla fine
Ora andare al f 36-42.  
F 33: taglia M/L SOLTANTO : [1 dir,1 rov ] 8x, 2 ass al dir,1 rov, [1dir,1 rov] fino alla fine .  Ora andare al f 36-42.            (32,34 m)
Ferri 33&34: taglia XL
Rip i ferri 31 & 32 un’altra volta  
F 35: taglia XL SOLTANTO : [1 dir,1 rov] 8x, 2 ass al dir,1 rov, [1 dir,1rov] fino alla fine . (32,34 m) 
ferri 36-42: a ciste 1×1 . 
Chiudere morbidamente .
Cucire con un unico filo del colore adatto
Rigurare la pantofola e cucire a punti nascosti o punto indietro .  
Nascondere i fili
Wear and enjoy!

P.S. I lightly spray the bottoms of my slippers with the spray version of “Plasti-Dip” for a non-skip sole.  

https://www.ravelry.com/patterns/library/better-dorm-boots-slippers

Read Full Post »

https://cdn.shopify.com/s/files/1/0780/7045/files/Patons-Astra-Baby-Hood.pdf?8115127643113827973

Taglie 3/6. 12/18 mesi

Ferri 3,5-4 mm circolari da 40 cm

Campione :22 m per 28 cm =10×10 cm

Materiale:Patons® AstraTM (50 g/147 m)

Colore A fuxia. 1 gom

Colore B verde 1 gom

Spiegazione

Con il col B e i ferri più piccoli montare 70 (76) m

Lav in tondo mettere un marker all’inizio del giro e lav a coste 1/1 (1 dir,1 rov) per [4 (5) cm].

G succ: lav 10 (11) m a coste e metterle in attesa , lav a coste fino alle ultime 10 (11) m e metterle in attesa

Lav in avanti e indietro sulle 50 (54) m rimaste in questo modo :

F succ (RL). *4 rov,1 aum int rov,* rip fino alle ultime 0 (4) m. e lavorarle al rov: 60 (64) m.

Cambiare con i ferri più grandi e il col A, e lav a m rasata fino a che il lav dall’ultimo ferro a coste misurerà [10 (12.5) cm], finendo con un f sul rov del lav .

Parte superiore :

Ora lavoreremo la parte centrale a m rasata e l’ultima delle m centrali con la prima di quelle laterali : al dir del lavoro lavorando due ass al dir ritorte e al f succ sul rov del lav due ass al rov, fino ad avere lavorato tutte le m laterali:

f 1 : (RS). 39 (43)dir . ssk.(2 ass ritorte )Girare .

F 2: 19 (23).rov, 2 ass al rov. Girare .

F 3 : 19 (23)dir. ssk. Girare.

Rip gli ultimi due ferri fino ad avere lavorato tutte le m laterali

Lasciare le 20 (24) m centrali in attesa

Tagliare A.

Bordo a coste

Al dir del lav con B e i ferri più piccoli lav al dir le 20 (22) m in attesa del bordo sotto il mento,riprendere e lav al dir 22 (26) m dal bordo del lato destro , lav al dir 20 (24) m in attesa, riprendere e lav al dir 22 (26) m dal lato sinistro. 84 (98)m

Lav in tondo mettere un marker per l’inizio del giro sulla prima m.

Lav 8 giri a coste 1/1 poi chiudere lavorando a coste

Color:

Contrast A Hot Pink (08416) Contrast B Emerald (02708)

Read Full Post »

CAMPFIRE COZY

BY LISA DI FRUSCIA

Misure del capo finito

284.5 cm x 104 cm

FILATO

Magpie Nest Worsted (100% Corriedale; 192 m/210 y per 100 g)

7 gom , in color Twilight Bronze

Or approximately 1303 m/1425 y of a Worsted weight yarn

FERRI & ALTRO

Circolari da 6.0 mm lunghi 120 cm

2 markers

CAMPIONE

15 m & 25 ferri per 10 cm a legaccio dolo il bloccaggio

ABBREVIAZIONI

kfb: aum una m lavorando la m due volte: al dir e al dir ritorto

m1l:aum intercalare con inclinazione a sinistra

m1r: aum intercalare con inclinazione a destra

pm: piazzare un marker

DL: dir del lav

RL: rov del lav

sl1: passare una m al rov senza lavorarla

sm: spostare il marker a destra

SPIEGAZIONE

Montare 3 m

Ferri d’impostazione:

F 1 (DL): kfb, 1 gett,1 dir,1 gett kfb . (4 m aumentate 7 m in totale )

F 2 (RL): 2 dir,1 dir ritorto, pm, 1 rov, pm, 1 dir rit,2 dir. (7 m)

Da qui in avanti si aumenteranno 4 m ad ogni ferro sul dir del lav e due m sul rov del lav.

SEZIONE 1 – Legaccio

F 1 (DL): 2 dir,1 gett,dir fino al marker, m1r, sm, 1 dir, sm, m1l, dir fino alle ultime 2 m,1 gett,2 dir,(4 m aumentate )

F 2 (RL): 1 dir, kfb, dir fino al marker, sm, 1 rov, sm, dir fino alle ultime 2 m, kfb, 1 dir. (2 m aumentate)

Rip i ferri 1 & 2; altre 18 volte (38 ferri in totale; 121 m)

Sezione 2 – ferri d’impostazione parte traforata

f 1 (DL): 2 dir,1 gett,dir fino al marker, m1r, sm, 1 dir, sm, m1l, dir fino alle ultime 2 m, 1 gett,2 dir. (4 m aumentate )

F 2 (RL): 1 dir, kfb, rovescio fino alle ultime due maglie passando i markers quando li incontrate, kfb, 1 dir. (2 m aumentate ; 127 m)

Punto traforato

F 1 (DL): 2 dir,1 gett,1 dir, *1 gett,pass 1 m al rov,1 dir,1 gett,acc la m passata sul dir e il succ gett,* rip fino al marker, m1r, sm, 1 dir, sm, m1l, pass 1 m , 1 dir, 1 gett, acc la m passata sul dir e sul gett, *1 gett,pass 1 m,1 dir,1 gett,acc la m passata sul dir e sul gett * rip fino alle ultime 3 m, 1 gett,1 dir,1 gett,2 dir. (4 m aumentate )

f 2 (R): 1 dir, kfb, 2 rov,far cadere il gettato , *2 rov,far cadere il gett * rip fino a 3 m prima del marker, 3 rov, sm, 1 rov, sm, 3 rov , *far cadere il gett,2rov ; * rip fino alle ultime 5m,far cadere il gett,2rov, kfb, dir . (2 m aumentate )

F 3: 2 dir,1 gett,2 dir, *1 gett,pass 1 m,1 dir,1 gett ,acc la m pass sul dir e il gett* rip fino al marker, m1r, sm, 1 dir, sm, m1l, pass 1 m,1 dir,1 gett,acc la m passata sul dir e il gett, *1 gett,passare una m,1 dir,1 gett,acc la m pass sul dir e il gett * rip fino alle ultime 4 m,1 gett,2 dir,1 gett,2 dir. (4 m aumentate )

F 4: 1 dir, kfb, 3 rov, far cadere il gett, *2 rov far cadere il gett* rip fino a 3 m prima del marker, 3 rov , sm, 1 rov, sm, 3 ry, *far cadere il gett,2 rov *rip fino alle ultime 6 m,far cadere il gett,3 rov, kfb, 1 dir. (2 m aumentate )

Rip i ferri 1 – 4; altre 13 volte . (295 m)

Sezione 3 – legaccio

F 1 (DL): 2 dir,1 gett,dir fino al marker, m1r, sm, 1 dir, sm, m1l,dir fino alle ultime 2m,1 gett,2 dir. (4 m aumentate )

F 2 (RL): 1 dir , kfb, dir fino al marker, sm, 1 rov , sm, dir fino alle ultime 2 m, kfb, 1 dir . (2 m aumentate )

Rip i ferri 1 & 2; altre 22 volte . (46 ferri in totale; 433 m)

Sezione 4 – m rasata

F 1 (DL): 2 dir,1 gett,dir fino al marker, m1r, sm, 1 dir, sm, m1l, dir fino alle ultime 2 m,1 gett,2 dir. (4 m aumentate )

F 2 (RL): 1 dir, kfb, rov fino alle ultime 2 m passando i markers quando li incontrate , kfb, 1 dir. (2 m aumentate )

Rip i ferri 1 & 2; altre 6 volte . (14 ferri in totale; 475 m)

Sezione 5 – legaccio

F 1 (DL): 2 dir,1 gett,dir fino al marker, m1r, sm, 1 dir, sm, m1l, dir fino alle ultime 2 m,1 gett,2 dir. (4 m aumentate )

F 2 (RL): 1 dir, kfb, dir fino al marker, sm, 1 rov , sm, 1 dir fino alle ultime 2m, kfb, 1 dir . (2 m aumentate )

Rip i ferri 1 & 2 un’altra volta . (4 ferri in totale; 487 m)

Sezione 6 – bordo a coste

F 1 (DL): 2 dir,1 gett*1 rov 3 dir* rip fino a 1 m prima del marker, 1 rov , m1r, sm, 1 dir, sm, m1l, *1 rov,3 dir * rip fino alle ultime 3 m, 1 rov,1 gett,2 dir. (4 m aumentate )

F 2 (RL): 1 dir, kfb, 1 rov , *1 dir,3 rov * rip fino a 2 m prima del marker, 1 dir,1 rov , sm, 1 rov , sm, 1 rov , *1 dir,3rov* rip fino alle ultime 4 m,1 dir,1 rov, kfb, 1 dir. (2 m aumentate )

F 3: 2 dir,1 gett,2 dir , *1 rov,3 dir * rip fino a 2 m prima del marker, 1 rov,1 dir , m1r, sm, 1 dy, sm, m1l, 1 dir , *1 rov,3 dir * rip fino alle ultime 5m, 1 rov,2 dir,1 gett,2 dir. (4 m aumentate )

F 4: 1 dir, kfb, *3 rov,1 dir* rip fino a 2 m prima del marker, 2 rov , sm, 1 rov , sm, 2 rov*k1 dir,3 rov* rip fino alle ultime 2 m, kfb, 1 dir . (2 m aumentate )

F 5: 2 dir,1 gett , *1 rov,3 dir*rip fino a 3 m prima del marker, 1 rov,3 dir,m1r, sm, 1 dir , sm, m1l, 2 dir , *1 rov,3dir * rip fino alle ultime 3 m, 1 rov,1 gett,2 dir (4 m aumentate )

F 6: 1 dir, kfb, 1 rov , *1 dir,3 rov * rip fino al marker, sm, 1 rov , sm, *3 rov,1 dir* rip fino alle ultime 3 m,1 rov, kfb, 1 dir . (2 m aumentate )

F 7: 2 dir,1 gett,2 dir, *1 rov 3 dir* rip fino al marker, m1r, sm, 1 dir, sm, m1l, *3 dir,1 rov* rip fino alle ultime 4m, 2 dir,1 gett,2 dir. (4 m aumentate )

F 8: 1 dir, kfb, *3 rov,1 dir* rip fino al marker, sm, 1 rov, sm, *1 dir,3 rov * rip fino alle ultime 2 m , kfb, 1 dir . (2 m aumentate )

Rip i ferri 1 – 8 un’altra volta , poi lav i ferri 1 & 2. (18 ferri in totale; 541 m)

Chiudere con la chiusura “Hiya Hiya Grandma’s Stretchy Bind Off”

Ecco qui video di Carrie Ramirez che lo mostra:

https:// https://youtu.be/kuAHhJfT2hU

Notare che il tutorial a coste 2/2 e dovrete adattare il ferro di chiusura al bordo che è di 3 dir,1 rov.

Oppure con una chiusura di vostra scelta.

Finiture

Nascondere i fili inumidire e stirare leggermente al vapore portando lo scialle alle misure indicate

Campfire Cozy page 4 – http://www.espacetricot.com – © Espace Tricot 2020 – for personal use only

https://www.ravelry.com/patterns/library/campfire-cozy

Read Full Post »

spiegazione dei simboli dall’alto in basso:

Dir sul dir e rov sul rov

Riv sul dir e dir sul riv

Gettato

Due ass al dir

Ssk:2 ass ritorti

Copertina misure

75×80 cm – dopo il bloccaggio

Filato

Artfil Merino Aran – 5 gomitoli

(100% merino wool 157 m / 172 yds) Color natural/undyed

Ferri

5.0 mm circ lunghi 80 cm

Campione

17 m :10 cm

Il campione qui non è essenziale

Motivo su 13 m che si ripete per 8 volte con 12 m di bordo ai lati

Spiegazione

Montare 128 m.

bordo: Lav a legaccio per 7,5 cm ( curca 26 ferri ) finendo con un f sul rov del lav.

parte principale:

F 1 (DL): 12 dir, *ssk, 4 dir,1 gett,1 d,1g,4d,2ass * rip altre 7 volte ,12 d

F 2 (RL):12 d, *1d,11r,1d* altre 7 volte , 12d.

F 3 (DL):12d* ssk, 3d,1g,3d,1g,3d,2ass * altre 7volte,12d.

F 4 (RL): Come il f 2

F 5 (DL):12d:, *ssk, 2d,1g,5d,1g,2d,2ass * rip altre 7volte,12d,

F 6 (RL):come il f 2

Continuare a lav ripetendo lo schema fino a 72,5 cm finendo con un f sul rov del lav

Quello della fito ha 32 ripetizioni.

bordo lav a legaccio per 7,5 cm finire al rov del lav lavorando dir (26 ferri)

nascondere i fili stirare al vapore.

Cuffia

misure

Circa 17,5 dal davanti al dietro

Filato

Artfil Mericana – 1 gom (100% merino wool, 244 m / 276 yds) Color natural/undyed

Ferri

3.75 mm circ lunghi 60 cm

Campione

21 m per 10 cm

Abbreviazioni

G: gettato

D: dir

R: rov

ssk: diminuzione di una m lavorando due m ass al dir ritorte

DL:dir del lav

RL: rov del lav

Spiegazione

Montare 76 m

Lav un f dir sul rov del lav, lav altri due ferri dir

Motivo.

F 1 (DL): foretti (primo ferro dello schema)

Pass 1 m con il filo davanti (pfd),2d,1g,ssk, 7d; (ssk, 4d,1g,1d,1g,4d,2ass) 3 volte , 7d,2ass,1g,3d.

F2 e tutti i ferri pari sul rov del lav:pfd,11d,(1d,11r,1d) 4 volte.12d.

F 3 (DL): pfd,11d,(ssk,3d,1g,3d,1g,3d,2ass) 4 volte,12d..

F 5 (DL): pfd,11d, (ssk, 2d,1g,5d,2ass) 4 volte ,12d

F 7 (DL) pfd,11d, (ssk, 4 d,1g,1d,1g,4d,2ass)4volte,12d.

F9(DL):pfd,11d(ssk, 3d,1g,3d,2ass)4volte ,12d.

F 11 (DL): pfd,11d, (ssk, 2d,1g,5d,1g,2d,2ass) 4 volte ,12d.

Lav i ferri da 1 a 12 2 volte, poi lav i ferri da 1 a 6 un’altra volta .

f succ (DL): rip il motivo nel f 7 fino alle ultime 25 m, ssk, girare .

Diminuzioni f 1 (RL): 2d,11r,2d,11r,2d,girare

Diminuzioni f 2 (DL): con il filo davanti passare 1 m dal f di ds al f di sin , portare il filo dietro , e lav due ass al dir. Lav 25 m come da motivo , ssk. Girare .

Rip i ferri di dim 1 e 2 fino a che ci saranno 12 m a sin del pannello e 13 m a ds ,finendo con un f sul rov del lav

Iniziare le coste sulla parte. centrale in questo modo:

Coste f 1 (DL): passare una m con il filo davanti da ds a sin , portare il fo dietro e lav 2 ass al dir, [2r,2d] 6 volte , 2r, ssk, girare .

Coste f 2 (RL): 1d, [2d,2r] 6 volte , 1d,girare .

Continuare lavorando questi 2 ferri fino a che resteranno 4 m a sin e 5 m a ds finendo con un f sul rov del lav.

Foretti (DL) : portare con il filo davanti una m da ds a sin , portare il filo dietro e lav 2 ass al dir , 1r,1g,2ass,1d,2r,1d, ssk, 1g,1r,2d,2r,2d,1r,1g,2ass,1d,2r,1d,ssk, 1g,1r, ssk, girare .

f succ (RL) : 1d, [2d,2r] 6 volte ,1d,girare .

Rip i f 1 e 2 a coste fino a che resterà 1 m ( al dir del lav)

Chiudere le m in questo modo : con il filo davanti passare una m da ds a sinistra , portare il filo dietro e lav due ass al dir, poi chiudere le m rimaste .

Nascondere i fili stirare al vapore .

Fare un laccetto i-cord

Montare 4 m su un ferro a doppie punte

Lav al dir, non girare il ferro ma far scivolare le m a destra, all’inizio del ferro, portando il filo dietro al lav di nuovo lav le 4 m al dir, ripetere fino ad ottenere un cordino lungo 50 cm circa. Chiudere le m

Passarlo nei foretti della base della cuffia.

Traduzione simboli dall’alto in basso:

Dir sul dir rov sul rov

Rov sul dir e dir sul rov

Gettato

Due ass al dir

Due ass al dir ritorto

https://espacetricot.files.wordpress.com/2011/12/petits_pins_en.pdf

Read Full Post »

MATERIALE
Approximately 2 x 50 gram gom 8ply (DK, sport weight) yarn
Ferri 4.00 mm
Ferri 4.00 mm circ lunghi 80 cm

campione
22.5 m per 10 cms

ABBREVIAZIONI
K – knit dir o lav a maglia
K2tog. – knit two stitches together lav due m ass al dir
yrn – yarn around needle (or yarn over needle) gettato
ktbl – knit through the back of the loop (or stitch) dir ritorto

con i ferri dir montare 6 m.
F 1 – ( rov del lav):1 dir,2 ass,1 gett,2 dir (1 gett per 2 volte) 1 dir

Row 1:K1, K2tog, yrn, k2, (yrn x 2) K1 (wrong side)
f 2: 3 dir,2 ass,1 gett,3 dir( lav ritorti i gettati del f precedente)

Row 2 – K3, K2tog, yrn, K3 (ktbl the 2 yrns from previous row)
f 3: 1 dir,2 ass,1 gett,5 dir

Row 3 – K1, K2tog, yrn, K5
f 4- chiudere 2 m,2 ass,1 gett,3 dir

Row 4 – Cast off 2 sts, K2tog, yrn, K3

Rip questi 4 ferri fino a 156 cms (o fino a quanto volete lunga la sciarpa ) finendo al f 4 del motivo poi chiudere le m morbidamente )

Al dir del lav riprendere e lav al dir dal lato dir del birdo pizzo,la primissima m del bordo ,poi riprendere le m dalla barretta tra le m e riprendete l’ultimissima m del bordo . Proseguire a legaccio per 28 ferri o fino alla larghezza desiderata

Chiudere le m morbidamente .

https://www.ravelry.com/patterns/library/lace-egded-scarf

abbreviazioni:

Cast on: Montare le m

row: ferro

Needle ferro per lavorare a maglia

yo: gettati

sts maglie

k2tog:2 ass al dir

p2tog:2 ass al rov

Bind off : chiudere le m

twice:2 volte

Cast on 12 sts and knit 1 row.

1st Row: k2, (yo) twice, k2tog, k6, yo, p2tog.

2nd row: yo, p2tog, k7, work k1 p1 into double yarn over made on previous row, k2.

3rd row: k11, yo, p2tog.

4th row: yo, p2tog, k11

5th row: k2, [(yo) twice, k2tog] two times, k5, yo, p2tog.

6th row: yo, p2tog, k6, work k1 p1 into double yarn over made on previous row, k1, work k1 p1 into double yarn over made on previous row, k2.

7th row: k13, yo, p2tog.

8th row: yo, p2tog, k13.

9th row: k2, [(yo) twice, k2tog] three times, k5,
yo, p2tog.

10th row: yo, p2tog, k6, (work k1 p1 into double yarn over made on previous row, k1) three times, knit 1.

11th row: k11, take 11th back on left-hand needle, slip 6 stitches over
that stitch (you will now have 2 sts on the left hand needle), yo, p2tog.

12th row: yo, p2tog, k10.

These 12 rows form the pattern. Repeat for desired length.

https://www.knitting-and.com/crafts-and-needlework/knitting/patterns/lace/shell-lace/

https://www.knitting-and.com/crafts-and-needlework/knitting/patterns/lace/german-lace/

abbreviazioni:

Cast on 8 stitches.
Row 1: K4, yo, k2tog, yo, k2tog.
Row 2: S1, k3, yo, k2tog, w2, k2tog.
Row 3: Yo, k1, kpws, k2, yo, k2tog, yo, k2tog.
Row 4: S1, k3, yo, k2tog, k4.
Row 5: Yo, k6, yo, k2tog, yo, k2tog.
Row 6: S1, k3, yo, k2tog, w2, k2tog, w2, s1, k1, psso, k1.
Row 7: K2, kpws, k1, kpws, k2, yo, k2tog, yo, k2tog.
Row 8: S1, k3, yo, k2tog, k7. Turn, bind off 5.
Repeat rows 1-8 for desired length
Abbreviations
w2 = wrap yarn twice around right needle : avvolgere il filo attorno al ferro 2 volte
kpws = knit and purl the wrapped stitches: lav al dir e al rov le m avvolte

Cast on 8 stitches.

Row 1: K4, yo, k2tog, yo, k2tog.

Row 2: S1, k3, yo, k2tog, w2, k2tog.

Row 3: Yo, k1, kpws, k2, yo, k2tog, yo, k2tog.

Row 4: S1, k3, yo, k2tog, k4.

Row 5: Yo, k6, yo, k2tog, yo, k2tog.

Row 6: S1, k3, yo, k2tog, w2, k2tog, w2, s1, k1, psso, k1.

Row 7: K2, kpws, k1, kpws, k2, yo, k2tog, yo, k2tog.

Row 8: S1, k3, yo, k2tog, k7. Turn, bind off 5.

Repeat rows 1-8 for desired length.

Cast on 8 stitches.
Row 1: K4, yo, k2tog, yo, k2tog.
Row 2: S1, k3, yo, k2tog, w2, k2tog.
Row 3: Yo, k1, kpws, k2, yo, k2tog, yo, k2tog.
Row 4: S1, k3, yo, k2tog, k4.
Row 5: Yo, k6, yo, k2tog, yo, k2tog.
Row 6: S1, k3, yo, k2tog, w2, k2tog, w2, s1, k1, psso, k1.
Row 7: K2, kpws, k1, kpws, k2, yo, k2tog, yo, k2tog.
Row 8: S1, k3, yo, k2tog, k7. Turn, bind off 5.
Repeat rows 1-8 for desired length
Abbreviations

https://www.knitting-and.com/crafts-and-needlework/knitting/patterns/lace/narrow_vandyke_edging/

Read Full Post »

  • Per la stanza dei più piccoli

  • Moda Vera’ Shiver 100g x 6 gom Main Colour (M) bianco
  • and 1 x gom Contrast Colour marrone (C)
  • Ferri 9mm
  • 2 cavi o spille per m in attesa
  • Feltro per occhi e naso

Misure

lunghezza (circa): 112 cm
larghezza(circa): 66 cm

Campione

11 m e 20 ferri a legaccio con ferri 9:10x10cm.

Spiegazione

Coda

Con i ferri 9 e il bianco montare quattro maglie.

F 1 dir

F 2: lav due volte al dir la prima e l’ultima m il resto a legaccio:6 m.

Ripetere gli ultimi due ferri fino ad avere 12 maglie.lavorare quattro ferri a legaccio su queste maglie e lasciare in attesa tagliare il filo

Zampa posteriore sinistra

Con i ferri 9 e il bianco montare 8 maglie.

F 1: dir

F 2 – Lavorare due volte la prima maglia, diritto fino all’ultima maglia lavorare due volte la maglia: 10 maglie.ripetere gli ultimi due ferri fino ad avere 18 maglie. Lavorare sette ferri a legaccio

f succ – 2 ass, dir fino alle ultime 2 m:2 ass :16 m

F succ dir

Ripetere gli ultimi due ferri un’altra volta: 14 maglie.lavorare due ferri a legaccio. **

f succ:Diritto fino all’ultima maglia, lavorarla due volte: 15 maglie. Lavorare tre ferri a legaccio. Ripetere gli ultimi quattro ferri fino ad avere 20 maglie. Lavorare un ferro. Mettere in attesa le maglie .

Zampa posteriore destra

Lavorare come la zampa sinistra fino a **.

Ferro successivo-lavorare due volte la prima maglia, diritto fino alla fine: 15 maglie.lavorare tre ferie legaccio. Ripetere gli ultimi quattro ferri fino ad ottenere 20 maglie. Lavorare un ferro.

Ferro di unione

 – lavorare due volte la prima maglia, diritto fino all’ultima maglia lavorarla due volte. Al diritto del lavoro lavorare le maglie in attesa della coda,, lavorare due volte la prima maglia, diritto fino alla fine poi lavorare al dritto del lavoro le maglie in attesa della zampa sinistra Lavorare due volte la prima maglia, diritto fino all’ultima maglia e lavorarla due volte: 58 maglie. Continuare a lavorare a legaccio fino a 45 cm dal punto di unione, lavorando il ferro sul rovescio

Ferro successivo-lavorare due volte la prima maglia, diritto fino all’ultima maglia, lavorarla due volte: 60 maglie.

Ferro successivo-diritto.

Ripetere gli ultimi due ferri due volte: 64 maglie. Continuare senza aumenti fino a 55 cm dal ferro di unione, lavorando l’ultimo ferro a rovescio del lavoro.

Separazione per le zampe anteriori

F succ – 21 dir, 2 ass,girare

Cont a lav su queste 22 m per la :

Zampa anteriore destra

**F succ (dl) – Dir.

f succ: Diritto fino alle ultime due maglie, due assieme al dritto: 21 m

Ripetere gli ultimi due ferri fino a che resteranno 16 maglie.lavorare 31 ferri a legaccio.

F succ – Lavorare due volte la prima maglia, diritto fino all’ultima maglia, lavorarla due volte: 18 m

Ripetere l’ultimo ferro un’altra volta: 20 maglie. Lavorare 15 ferri a legaccio.

f succ  – 2 ass. dir fino alle ultime due maglie, due assieme al dritto.: 18 maglie. Ripetere l’ultimo ferro fino a che resteranno 14 maglie. Chiuderle sul rovescio del lavoro.

Al diritto del lavoro tornare a lavorare alle maglie rimaste, chiudere le successive 18 maglie, due assieme al dritto, diritto fino alla fine. Continuare sulle 22 maglie per la zampa anteriore sinistra, ripetere da ** fino alle fine come fatto per la zampa anteriore destra..

Testa (iniziando dal naso)

Con i ferri 9mm e il marrone montare 8 maglie,

F 1: (rl): dir

F 2:Lavorare due volte la prima m,dir fino all’ultima maglia, lavorarla due volte: 10 maglie. Ripetere gli ultimi due ferri un’altra volta: 12 m. Lavorare 7 ferri a legaccio , tagliare il filo e iniziare a lavorare con il bianco

F 2: lavorare due volte la prima maglia, diritto fino all’ultima maglia, lavorarla due volte: 10 maglie

Ripetere gli ultimi due ferri un’altra volta: 12 maglie. Lavorare 7 ferri a legaccio, tagliare il filo marrone e continuare con il bianco..

f succ- Lavorare due volte la prima maglia, diritto fino all’ultima maglia, lavorarla due volte: 14 maglie. Ripetere l’ultimo ferro fino ad avere 22 maglie. .

Ferro successivo-diritto.

F succ – Lavorare due volte la prima maglia, diritto fino all’ultima maglia lavorare due volte la maglia: 24 maglie.ripetere gli ultimi due ferri fino ad avere 28 maglie. Lavorare 29 ferri a legaccio

Ferro successivo-due assieme, diritto fino alle ultime due maglie, due assieme: 26 m.

Ferro successivo-diritto.

Ripetere gli ultimi due ferri fino ad avere 22 maglie. Ferro successivo punto due assieme, diritto fino alle ultime due maglie, due assieme: 20 maglie. Ripetere l’ultimo ferro fino a che resteranno 14 maglie. Chiudere sul rovescio del lav

ORECCHIE (farne 2)

Con i ferri 9mm e il marrone montare 4 m

Ferro uno-lavorare due volte la prima maglia, due diritti, lav due volte l’ultima m :6M

Rip l’ultimo ferro 2 volte:10 m

Lav -11 ferri a legaccio

Tagliare il filo Lasciando lungo passarlo nelle maglie rimaste tirare e fissare

Finiture

Non stirare. Tagliare due occhi e il naso dal filtro, appuntarlo in posizione sulla testa, e poi cucirlo come da foto. Cucire la testa in posizione tra le zampe anteriori. Piazzare le orecchie imposizione ai lati della parte alta della testa e cucirli. Con il filo marrone ricamare le zampe anteriori e posteriori come nella foto

Originale:

  • Moda Vera’ Shiver 100g x 6 balls Main Colour (M) and 1 x ball Contrast Colour (C)
  • A pair 9mm knitting needles or size required to give correct tension.
  • 2 stitch-holders
  • Black felt square for eyes and nose
  • Scissors, yarn needle, tape measure

MEASUREMENTS

Length (approx): 112 cm
Width (approx): 66 cm

TENSION

11 sts and 20 rows to 10cm over garter st, using 9mm needles.

INSTRUCTIONS

TAIL

Using 9mm needles and M, cast on 4 sts.

1st row – Knit.

2nd row – Inc knitways in first st, knit to last st, inc knitways in last st … 6 sts.

Rep last 2 rows until there are 12 sts. Knit 4 rows garter st. Slip these sts onto a stitch-holder and leave. Break off yarn.

LEFT FOOT

Using 9mm needles and M, cast on 8 sts.

1st row – Knit.

2nd row – Inc knitways in first st, knit to last st, inc knitways in last st … 10 sts. Rep last 2 rows until there are 18 sts. Knit 7 rows garter st.

Next row – K2tog, knit to last 2 sts, K2tog … 16 sts.

Next row – Knit. Rep last 2 rows once more … 14 sts. Knit 2 rows garter st. **

Next row – Knit to last st, inc in last st … 15 sts. Knit 3 rows garter st. Rep last 4 rows until there are 20 sts. Knit 1 row. Slip rem sts onto a stitch-holder and leave.

RIGHT FOOT

Work as for Left Foot to **.

Next row – Inc in first st, knit to end … 15 sts. Knit 3 rows garter st. Rep last 4 rows until there are 20 sts. Knit 1 row.

Joining row – Inc in first st, knit to last st, inc in last st, with RS facing, knit across sts from Tail stitch-holder thus – inc in first st, knit to last st, inc in last st, then with RS facing, knit across sts from Left Foot stitch-holder thus – inc in first st, knit to last st, inc in last st … 58 sts. Cont in garter st until work measures 45cm from joining row, working last row on WS.

Next row – Inc in first st, knit to last st, inc in last st … 60 sts.

Next row – Knit. Rep last 2 rows twice more … 64 sts. Cont without shaping, until work measure 55cm from joining row, working last row on WS.

Divide for Front Legs- Next row – K21, K2tog,turn. Cont on these 22 sts for Right Front Leg.

**Next row(WS) – Knit.

Next row – Knit to last 2 sts, K2tog … 21 sts. Rep last 2 rows until 16 sts rem. Knit 31 rows garter st.

Next row – Inc in first st, knit to last st, inc in last st … 18 sts. Rep last row once more … 20 sts. Knit 15 rows garter st.

Next row – K2tog, knit to last 2 sts, K2tog … 18 sts. Rep last row until 14 sts rem. Cast off on WS.

With RS facing, join yarn to rem sts and cast off next 18 sts, K2tog, knit to end. Cont on these 22 sts for Left Front Leg. Rep from ** to end as for Right Front Leg.

HEAD (beg at nose)

Using 9mm needles and C, cast on 8 sts.

1st row (WS) – Knit.

2nd row – Inc in first st, knit to lst st, inc in last st … 10 sts. Rep last 2 rows once more … 12 sts. Knit 7 rows garter st. Break off C and join in M.

Next row – Inc in first st, knit to last st, inc in last st … 14 sts. Rep last row until there are 22 sts.

Next row – Knit.

Next row – Inc in first st, knit to last st, inc in last st … 24 sts. Rep last 2 rows until there are 28 sts. Knit 29 rows garter st.

Next row – K2tog, knit to last 2 sts, K2tog … 26 sts.

Next row – Knit. Rep last 2 rows until 22 sts rem.

Next row – K2tog, knit to last 2 sts, K2tog … 20 sts. Rep last row until 14 sts rem. Cast off on WS.

EARS (make 2)

Using 9mm needles and C, cast on 4 sts.

1st row – Inc knitways in first st, K2, inc knitways in last st … 6 sts. Rep last row twice more … 10 sts. Knit 11 rows garter st. Break off yarn, leaving a long end. Run end through rem sts, draw up and fasten off securely.

FINISHING

DO NOT PRESS. Cut 2 eyes and a nose shape from the felt, pin in position to head, then sew securely as pictured. Sew head in position between front legs as pictured. Place ears in position at either side at top of head and sew in position. Using C, embroider claws on front and back feet as pictured.

https://www.spotlightstores.com/projects/knitting-crochet-projects/shiver-bear-rug-project

Read Full Post »

Per il vostro principino o la vostra principessina..!

materiale:

4 x 100g gom di ‘Bella Baby’ BABY WONDER

o 8 x 50g balls ‘Bella Baby’ SUGAR

o 10 x 50g balls ‘Moda Vera’ MERINO

NB: We used Bella Baby ‘Baby Wonder’ for this finished project

1 pair 4.00mm knitting needles or size needed for correct tension

Scissors, yarn needle, tape measure

Finished Size

104cm x 104cm (approx)

ferri 4mm

Misure finali:

104 x194 cm circa

Spiegazione

Montare 200 m e lav 4 ferri a m rasata

Motivo: :

F 1 (dl): 9 dir *2 ass,1 gett,22 dir,* rip fino alle ultime 23 m :2 ass,1 gett,21 dir.
F 2 & tutti i ferri pari (rl):rov.
F 3: 9 dir, *(1 gett,1 acc) rip 2 volte,20 dir,* rip fino alle ultime 23 m (1 gett,1 acc) per 2 volte,19 dir.
F 5:7 dir, *(2 ass,1 gett) per 3 volte,18 dir,* rip fino all’ultima m:1 dir.
f 7: 7 dir, *(1 gett,1 acc) 4 volte , 16 dir, * rip fino all’ultima m,1 dir.
F 9: Come il f 5.
F 11: Come il f 3.
F 13: Come il f 1.
F 15:Dir
F 17: 22 dir, *1 gett,1 acc,22 dir, * rip fino alle ultime 10 m, 1 gett,1 acc,8 dir.
F 19: 20 dir, *(2 ass,1 gett, ) 2 volte , 20 dir * rip fino alle ultime 12 m, (2 ass,1 gett, ) 2 volte , 8 dir.
F 21:20 dir *(1 gett,1 acc) 3 volte , 18 dir * rip fino alle ultime 12 m, (1 gett, 1 acc) 3 volte , 6 dir
F 23: come il f 19.
F 25: come il f 17.
F 27:dir.
F 28:rov
Gli ultimi 28 ferri informano il motivo. Ripetere il motivo per nove volte, poi chiudere le maglie morbidamente.

BORDO

Montare 14 m
F 1(Dl): pass 1 m,1 dir,1 gett,2 ass,6 dir,1 gett,2 ass,1gett,2 dir:15 m.
F 2& tutti i ferri pari (rl): 1 gett,2 ass, dir fino alla fine
F 3:pass 1 m,1 dir,1 gett,2 ass,5 dir (1 gett,2 ass ) per 2 volte),1 gett,2 dir:16m.
F 5: pass 1 m,1 dir,1 gett,2 ass,4 dir (1 gett,2 ass ) per 3 volte ,1gett,2 dir:17 m
F 7: pass 1 m,1 dir,1 gett,2 ass,3 dir (1 gett,2 ass)4 volte,1gett,2 ass:18dir .
F 9: pass 1 m ,1 dir,1 gett,2 ass,2dir (1 gett,2 ass) 5 volte,1 gett,2 dir :19 m.
F 11: pass 1 m,1 dir,1 gett,2 ass,2 dir (2 ass,1 gett)5 volte,2 ass,1 dir:18m.
F 13: pass 1 m,1dir,1 gett,2 ass,3 dir (2 ass,1 gett)4 volte,2 ass,1 dir :17 m.
F 15:pass 1 m,1dir,1 gett,2 ass,4 dir (2 ass,1 gett) 3 volte,2 ass,1 dir :16 m.
F 17: pass 1 m,1 dir,1 gett,2 ass,5 dir (2 ass,1 gett)2 volte,2 ass,1 dir : 15m.
F 19: pass 1 m,1 dir,1 gett,2 ass,6 dir, 2 ass,1 gett,2 ass,1 dir:14 m.
F 20: Come il f 2.
Gli ultimi 20 ferri formano il motivo del bordo, ripetere fino a che il bordo misurerà 4 ,4 metri finendo al ferro 19. Chiudere morbidamente al dritto
Consiglio di appuntarlo attorno alla copertina verso la fine per rendervi conto delle misure del bordo

Finiture

Appunta al rov  la parte diritta del bordo sul dir della copertina per 1 cm , creare una pieghina ad ogni angolo cucire e cucire le due parti finali tra loro.
Stirare leggermente al vapore

Originale

  • 4 x 100g balls ‘Bella Baby’ BABY WONDER
    • or 8 x 50g balls Bella Baby Sugar
    • or 10 x 50g balls Moda Vera Merino
    • NB: We used Bella Baby Baby Wonder for this finished project 1 pair 4.00mm knitting needles or size needed for correct tension
    • Scissors, yarn needle, tape measure

INSTRUCTIONS

SPECIAL ABBREVIATIONS

foll = follows/ing,K = knit,K2tog =knit 2 sts together,P =purl,patt = pattern,psso =pass slipped st over,RS = right side, sl =slip,st/s = stitch/es,WS = wrong side,yfwd =yarn forward,yon = yarn over needle

SHAWL

Cast on 200 sts and work 4 rows of stocking st. Commence lace patt as foll:
Row 1 (RS): K9, *K2tog, yfwd, K22, repeat from * to last 23 sts, K2tog, yfwd, K21.
Row 2 & all even rows (WS): Purl.
Row 3: K9, *(yfwd, sl 1, K1, psso) twice, K20, repeat from * to last 23 sts, (yfwd, sl 1, K1, psso) twice, K19.
Row 5:K7, *(K2tog, yfwd) 3 times, K18, repeat from * to last st, K1.
Row 7: K7, *(yfwd, sl 1, K1, psso) 4 times, K16, repeat from * to last st, K1.
Row 9: As Row 5.
Row 11: As Row 3.
Row 13: As Row 1.
Row 15:Knit.
Row 17: K22, *yfwd, sl 1, K1, psso, K22, repeat from * to last 10 sts, yfwd, sl 1, K1, psso, K8.
Row 19: K20, *(K2tog, yfwd) twice, K20, repeat from * to last 12 sts, (K2tog, yfwd) twice, K8.
Row 21:K20, *(yfwd, sl 1, K1, psso) 3 times, K18, repeat from * to last 12 sts, (yfwd, sl 1, K1, psso) 3 times, K6.
Row 23: As Row 19.
Row 25: As Row 17.
Row 27:Knit.
Row 28:Purl.
The last 28 rows form patt. Repeat patt 9 times. Cast off loosely.

BORDER

Cast on 14 sts.
Row 1(RS): sl 1, K1, yfwd, K2tog, K6, yfwd,K2tog, yfwd, K2…15 sts.
Row 2& all even rows (WS): yon, K2tog, knit to end.
Row 3:sl 1, K1, yfwd, K2tog, K5, (yfwd, K2tog) twice, yfwd, K2…16 sts.
Row 5: sl 1, K1, yfwd, K2tog, K4, (yfwd, K2tog) 3 times, yfwd, K2…17 sts.
Row 7:sl 1, K1, yfwd, K2tog, K3, (yfwd, K2tog) 4 times, yfwd, K2…18 sts.
Row 9: sl 1, K1, yfwd, K2tog, K2, (yfwd, K2tog) 5 times, yfwd, K2…19 sts.
Row 11:sl 1, K1, yfwd, K2tog, K2, (K2tog, yfwd) 5 times, K2tog, K1 … 18 sts.
Row 13: sl 1, K1, yfwd, K2tog, K3, (K2tog, yfwd) 4 times, K2tog, K1 … 17 sts.
Row 15:sl 1, K1, yfwd, K2tog, K4, (K2tog, yfwd) 3 times, K2tog, K1…16 sts.
Row 17:sl 1, K1, yfwd, K2tog, K5, (K2tog, yfwd) twice, K2tog, K1…15 sts.
Row 19: sl 1, K1, yfwd, K2tog, K6, K2tog, yfwd, K2tog, K1…14 sts.
Row 20: As Row 2.
The last 20 rows form patt. Repeat pattern until border measures 4.4m, ending with a Row 19. Cast off knitways.

FINISHING

Pin wrong side of border straight edge over right side of shawl edges by 1cm, creating pleats on each corner to keep border flat, joining cast on and cast off edges together under one corner pleat. Over sew border to wrap. Weave in loose ends. Press lightly with a cool iron under a cloth.

https://www.spotlightstores.com/projects/knitting-crochet-projects/knitted-baby-shawl-project

Read Full Post »

ferri 4 diritti e circolari ( lunghi 60 cm)

200 gr di filato da lav con i ferri indicati

Campione: 18 m per 36 ferri

Circonferenza 62 cm per 32 di lunghezza

Montare 120 m lasciando il filo più corto lungo almeno un metro per la cucitura del fondo

Lav in tondo facendo attenzione al primo giro che le m siano tutte allineate

Lav a m rasata in tondo ( tutti i giri al dir) per 32 cm

Al g succ lav solo sulle prime 30 m con i ferri dir lasciando le altre in attesa

F 1:3 dir,24 rov,3 dir

F 2: dir

Rip questi due ferri fino a 35 cm finendo con il ferro 1

Unire a p maglia le 30 m lavorate alle succ 30 m sul f circolare per formare l’anello in cui infilare il manico della borsa

Con i ferri dir tornare a lav le succ 30 m e girare

F 1:3 dir,24rov,3dir

F 2:dir

Rip questi 2 ferri fino a 60 cm finendo al f 1

Con l’ago cucire a p maglia queste 30 m del manico alle 30 m restanti del f circolare

Finiture

Stendere la borsa con la parte dell’anello più piccolo di fronte al manico

Cucire il fondo e infilare il manico nell’anello

https://www.ravelry.com/patterns/library/a445-large-japanese-knot-bag

Read Full Post »

misure

Approx. 42cm x 140cm

filato

The Yarn Collective

colore: Johannas Sage x 4 gomitoli da 100g

Ferri

4mm

Campione

30 m per 30 ferri con i ferri 4mm e il punto Wavy Lace 10 x 10cm

Spiegazione

Montare 126 m.

F 1(dir del lav):dir

F 2: rov

F 3: *(2 ass al rov ) 3 volte , (1 gett,1 dir) 6 volte, (2 ass al rov ) 3 volte;* rip per tutto il ferro

F 4 dir

Ripetere sempre questi 4 ferri fino a

140cm o alla lunghezza desiderata

Chiudere le m , nascondere i fili

Finiture

Stirare al vapore

Fare 4 nappine di 14cm tagliando 8 pezzi di filo lunghi ognuno 24 cm, dividere ogni pezzo a metà e arrotolare un altro filo tutto attorno a 2 cm dalla parte della piegatura, fissare e cucire ogni nappina ad ogni angolo della stola.

https://www.lovecrafts.com/en-gb/downloadable/customer/products/id/242214/

Read Full Post »

Misure

lunghezza : 185 cm profondità: 46 cm

MATERIALE

Filato: Sport weight yarn, ca 320m/100g

Colore principale MC: ca 100g – 320m

CC1: ca 25g – 80m

CC2: ca 25g – 80m

CC3: ca 25g – 80m

CC4: ca 25g – 80m

CC5: ca 25g – 80m

Quello della foto è lavorato con in Dandelion yarns Rosy sport (100% merino wool, 320m/100g) in questi colori:

Il colore principale per la parte centrale

CC1-CC5: piccoli gomitoli di varie gradazioni del rosa da , 25g ciascuno.

Ferri :

4 mm circolari lunghi , 120-150 cm

Notioni:

Ago da lana

Campione

20 m / 23 righe di legaccio = 10 cm a legaccio

Il campione non è fondamentale, ma può creare differenza nella misura dello scialle. Potete sostituire il filato con un filato sport o sottile della medesima quantità. Questo modello è una buona opportunità per usare i gomitoli rimasti

Non usate filato che si infeltrisca facilmente come superwash

Spiegazione

Preparate i vostri gomitoli dei colori secondari come poi li vorrete utilizzare attribuendogli il nome come :

C1-C2 fino a C5

Sezione colore principale

Con il colore principale (MC) montate 2 m.

F 1 (Dir del lav): Kfb, dir fino alla fine

F 2 (Rov del lav): dir fino all’ultima m,kfb

F 3 (dir del lav ): Kfb, dir fino alla fine

F 4 (rov del lav ): dir fino all’ultima m , kfb

F 5 (dir del lav ): Kfb, dir fino all’ultima m , kfb

F 6 (rov del lav): punta: 1 rov,1 dir, passare la prima m sulla seconda,1 dir, passare la prima sulla seconda,1dir,passare la prima sulla seconda, (3 m chiuse), dir fino all’ultima m, kfb

Rip i ferri 1-6 fino a che vi resteranno solo 12-13 grammi del col princ, finendo con un ferro sul rovescio del lavoro.

Potete pesare il filo con la bilancia da cucina oppure potete giusto stimare la quantità di filato, quello che vi resta del colore principale dovrebbe essere circa la metà di uno dei gomitoli dei colori secondari.

Se avete utilizzato il filato che è stato consigliato e il vostro campione collima con quello della spiegazione dovreste aver fatto 34 punte..

Sezione a righe:

Nota: Mentre lavorate le righe, portate il filo al bordo superiore infatti non è necessario tagliarlo ogni volta. Avvolgete assieme i due fili dei due colore per mantenere pulito il bordo (guardare in fondo la spiegazione di come unire due fili assieme)

Al dir del lav iniziate con il col CC1.

Continuare a lav come impostato ma a righe – lav 2 ferri con CC1 e due ferri con il col principale( MC.)

Passare al colore principale ogni due ferri unendo insieme l’ultimo filo del colore principale è il primo filo di CC2.

Continuare come stabilito, lavorare le strisce con CC1 e CC2 e cambiare i fili ogni due ferri finché non si esaurisce CC1. Unire  la fine di CC1 e un'estremità di CC3.Continuare come stabilito, lavorare le strisce con CC2 e CC3 e cambiare i fili ogni due ferri finché non si esaurisce CC2. Unire la fine di CC2 e un'estremità di CC4.Continuare come stabilito, lavorare le strisce con CC3 e CC4 e cambiare i fili ognidue ferri fino a quando non si esaurisce CC3. Unire la fine di CC3 e un'estremità di CC5.Continuare come stabilito, lavorare le strisce con CC4 e CC5 e cambiare i fili ogni due ferri finché non si sta per esaurire CC4, terminando CC4 con un ferro sul rov del lav .(Se stai usando il filato raccomandato e se il tuo campione è corretto, ora dovresti avere circa 53 denti.)Continua con CC5, terminando con il ferro  5.

chiudete con il col CC5

Chiusura:1 rov , *1 dir, pass la prima m sulla seconda *. Rip ** fino a che resterà solo una m , tagliare il filo passarlo nell’ultima m tirare e fissare.

Abbreviazioni

kfb – lav al dir davanti& dietro – Lavorare al dritto il davanti e il dietro della stessa Amalia aumentando così una m

Come unire assieme due fili:

Prepara le estremità: rimuovi alcune delle fibre delle estremità dei filati per ottenere un filo leggermente più sottile. Evitare di tagliare i fili, strappare qualche fibra . 2. Posizionare entrambi i fili in parallelo e mescolare le fibre di entrambi i fili con le dita. 3. Strofina il raccordo tra i palmi umidi. Continua fino a quando entrambi i fili creano una connessione regolare. I filati si sono uniti insieme a causa dell'umidità e dell'attrito.

https://www.ravelry.com/patterns/library/zero-waste-shawl

Read Full Post »

« Newer Posts - Older Posts »