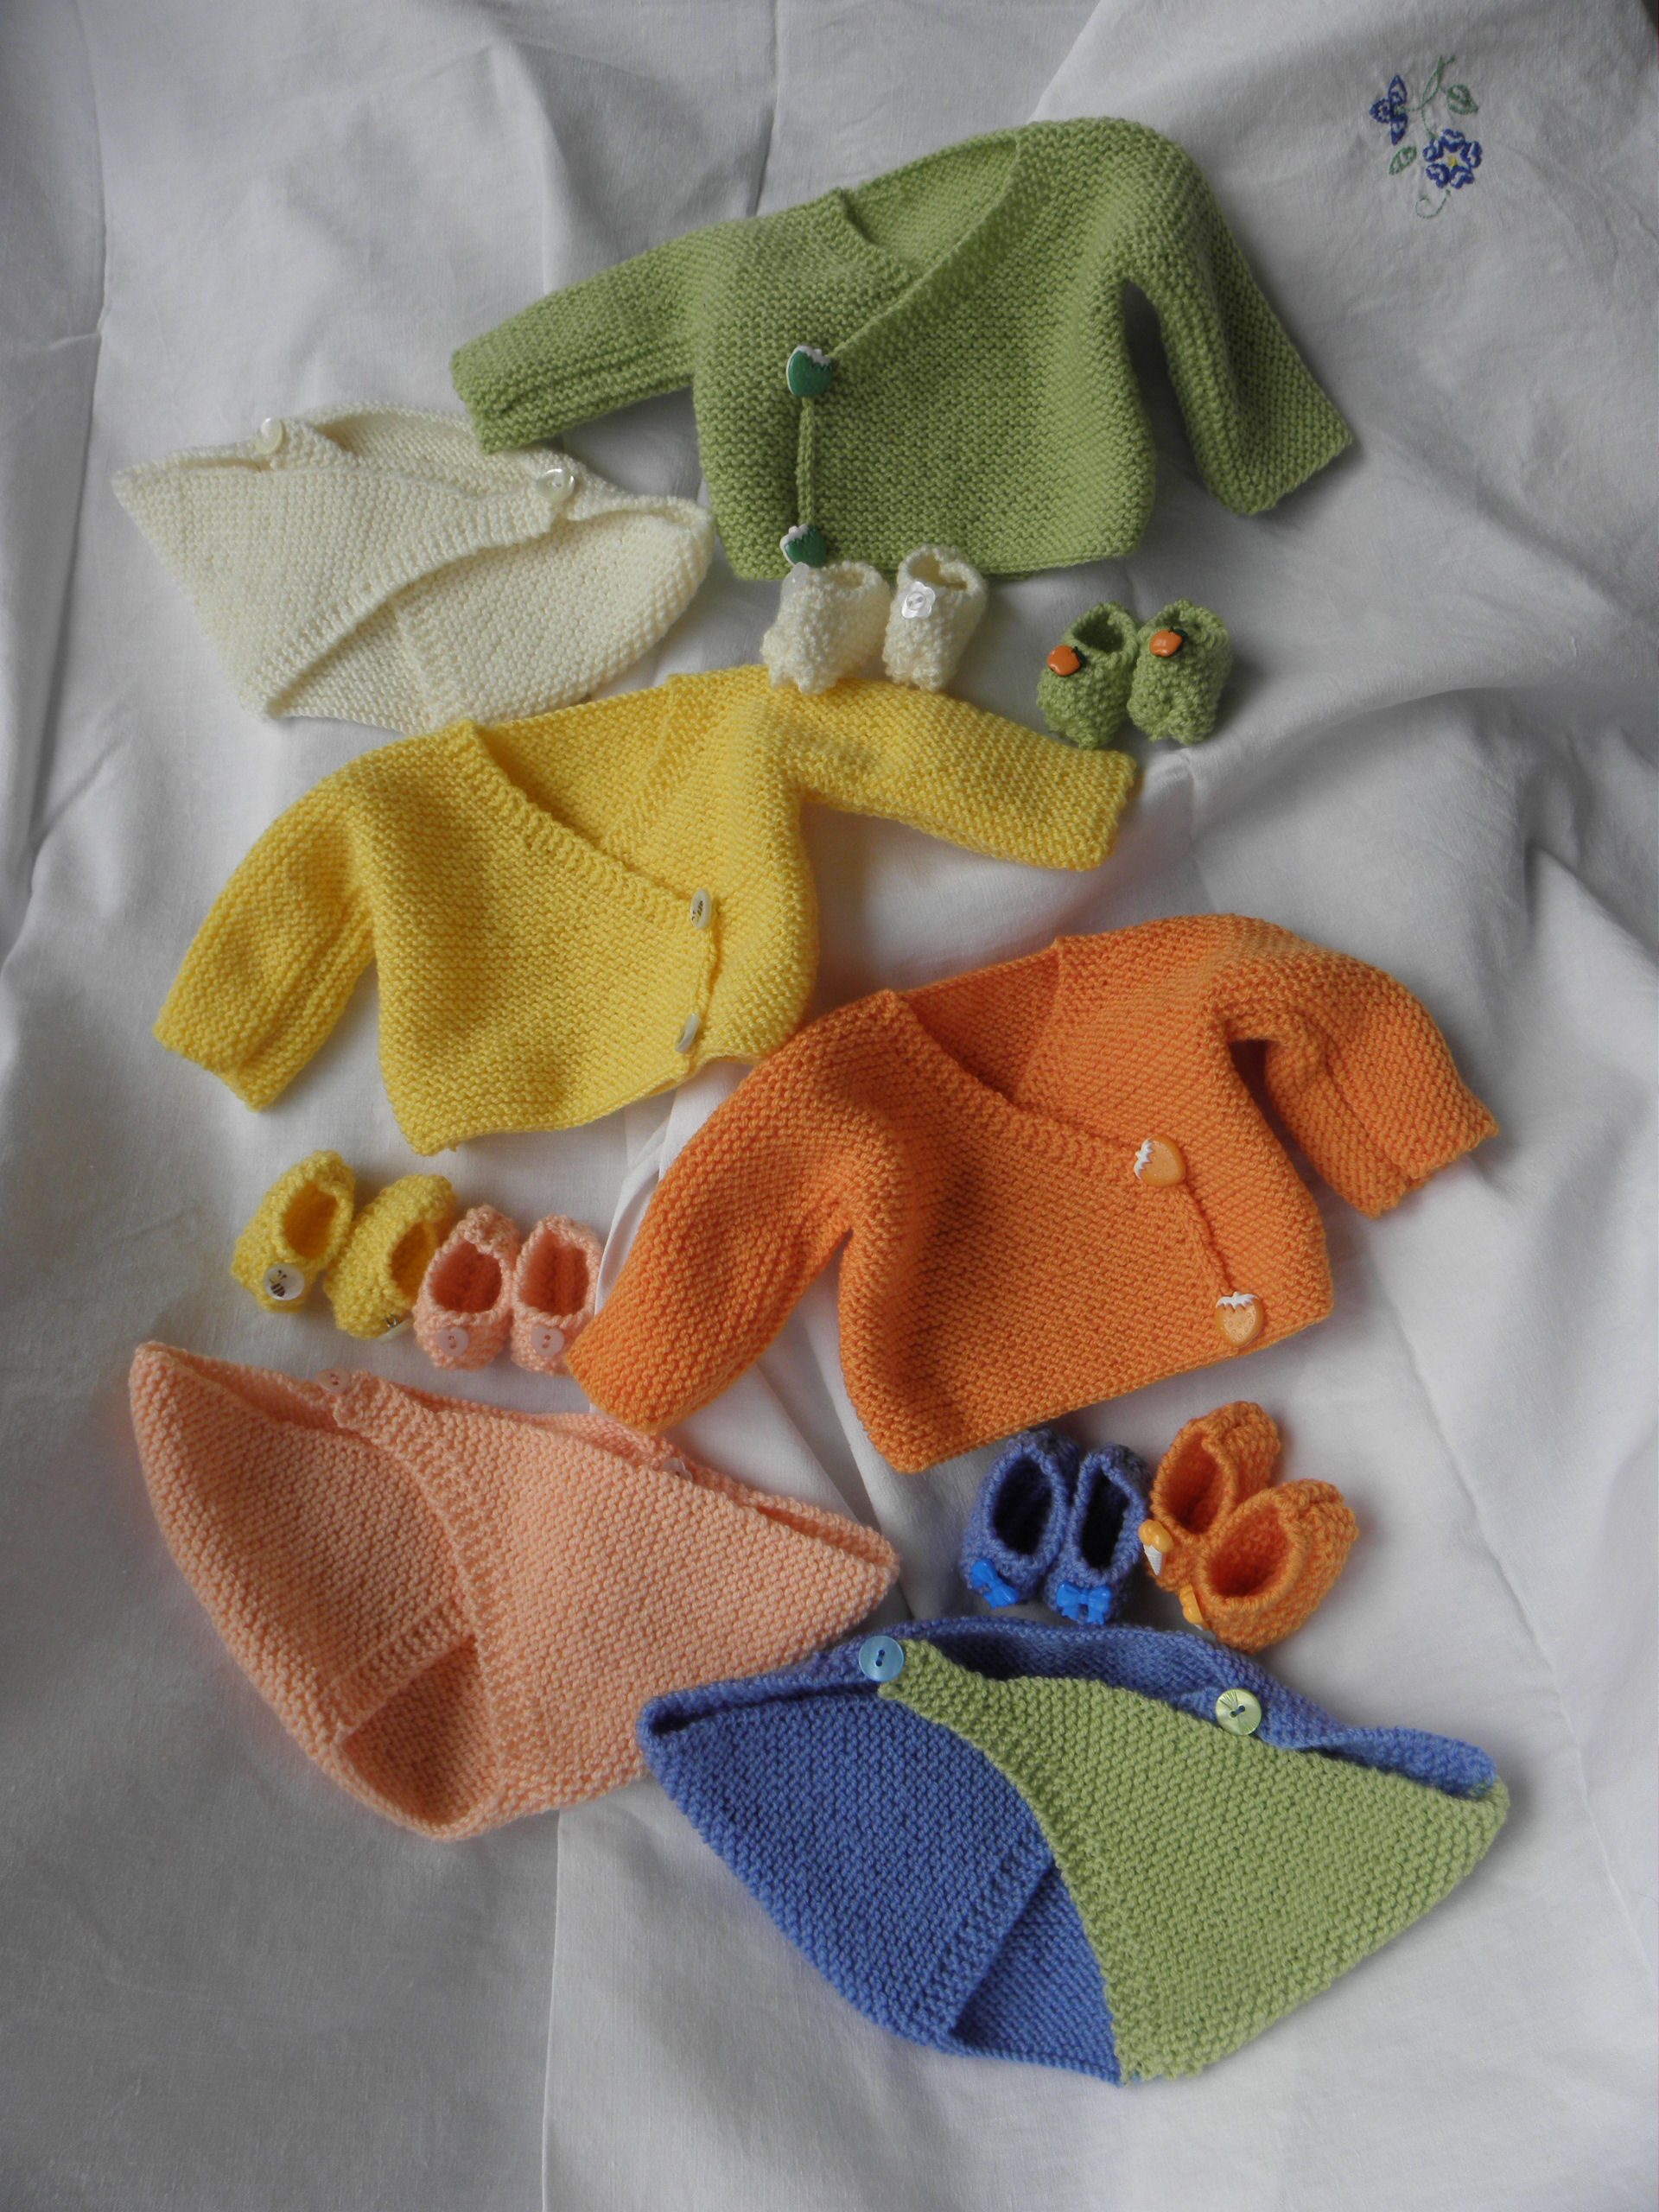
Oggi nasce una nuova categoria: “VINTAGE”, modelli antichi di coprifasce e cappottini per chi apprezza il gusto “retro” di questi piccoli capi.
TRADUZIONI IN CORSO…
CAPPOTTINO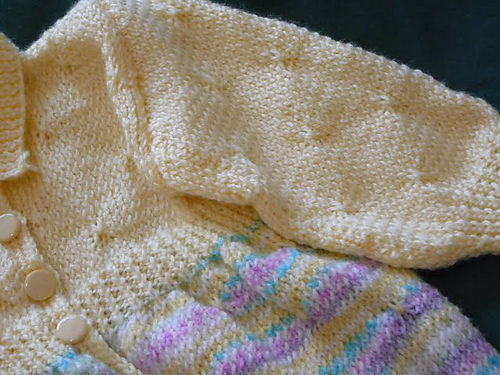
MISURA 3-6 MESI
FERRI 2-3
uncinetto 2
CAMPIONE-28 M X 42 FERRI= 10 CM
misure
circonferenza-55 cm
lunghezza fino al collo dietro-40 cm
lunghezza maniche fino agli scalfi-20 cm
larghezza spalle dietro-20 cm
DIETRO
Con i ferri 3 montare 89 m e lavorare a m rasata per 4 ferri cominciando con 1 ferro rovescio.
iniziare il primo gruppo dei motivi:
ferro5 ( rovescio del lavoro)-3 rov,” filo dietro il lavoro, passare le 3 m successive sul f di destra, riportare il filo davanti” ripetere fino alle ultime 3 m, finire con 3 rovesci
immagine del punto, fatti i 4 ferri in cui si è passato il filo dietro le 3 maglie senza lavorarle:
 si inserisce sul diritto del lavoro, ilferro destro sotto i fili e si lavora la m centrale dietro questi:
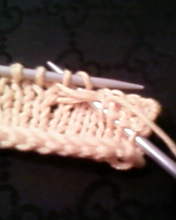 e si lavora la m normalmente:
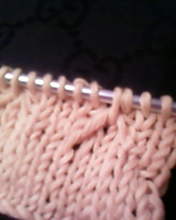
ferro6-ripetere ancora 1 volta gli ultimi 2 ferri, ( il ferro a diritto della m rasata e il ferro a rovescio del motivo),poi ripetere ancora il 5° ferro( quello del motivo), abbiamo fatto 9 ferri.
ferro 10-4 dir” infilare la punta del ferro di destra sotto l’occhiello dele 3 m passate e nella m successiva del ferro di sinistra, lavorare gli occhielli e la maglia assieme, poi fare 15 diritti” ripetere la sequenza tra virgolette e finire con 4 dir.
lavorare a m rasata per 4 ferri
Iniziare il secondo gruppo di motivi
ferro 15-11 rov,ripetere la sequenza tra virgolette del 5° ferro e finire con 11 rov.
I motivi del secondo gruppo sono centrali rispetto ai motivi del primo.
ferro 16-diritto,ripetere la sequenza tra virgolette del 10° ferro fino alle ultime 12 m:12 diritti.
Ripetere questi 20 ferri per completare il modello, e finire con 3 ferri a m rasata dopo l’ultimo gruppo di motivi.
FERRO DI DIMINUZIONI
6 DIR,” 2 ass al dir,1 dir” ripetere per 25 volte finire con 5 dir= 63 m,cambiare con i ferri più piccoli e lavorare a coste 1/1
f1-1 dir,” 1 rov,1 dir” fino alla fine
f2-1 rov” 1 dir, 1 rov” fino alla fine
ripetere questi ferri per 2,5 cm e finire al diritto del lavoro
Con i f più grandi fare 4 ferri a m rasata.
f5-6 rov,” ripetere la sequenza tra virgolette del 5° ferro e finire con 6 rov.
Continuare a lav secondo il modello per 9 cm oltre le coste.
SCALFI
Chiudere 3 m all’inizio dei 2 ferri seguenti e continuare seguendo il modello sulle 57 m rimaste per 9 cm dall’inizio degli scalfi , finire con 4 ferri oltre l’ultimo gruppo del motivo, poi chiudere tutte le maglie.
DAVANTI DESTRO
Con i f 3 montare 65 m e fare 4 f a m rasata ( si comincia con un f rovescio si finisce con un ferro diritto)
F5-11 rov,ripetere la sequenza tra virgolette del 5° ferro del dietro e finire con 3 rov.
Continuare secondo il modello fino alla stessa altezza degli scalfi del dietro
SCALFI
FERRO DI DI MINUZIONI
(al diritto del lavoro)-3 dir,” ” 2 ass al diritto”rip per 19 volte e finire con 2 dir= 45 m
Con i f 2,5 fare gli stessi ferri a coste che abbiamo fatto per il dietro, poi, con i f 3, fare 4 f a m rasata.
f5-7 rov,ripeter la sequenza tra virgolette del 5à ferro e finire con 3 rov, lavorare secondo il modello per 4,5 cm( quasi 5: 1 inch e 3/4..)e finire con 1 ferro diritto.
SCALFI
Chiudere 4 m all’inizio del ferro successivo, continuare sulle 41 m rimaste per 12,5 cm oltre le coste e finire al diritto del lavoro con 3 ferri oltre l’ultimo gruppo di motivi.
DIMINUZIONI DELLO SCOLLO
Al f successivo chiudere 19 m , poi ” 2 assieme al diritto, 1 dir) ripetere per 6 volte.
Lav a m rasata sulle 15 m rimaste per 5 ferri, poi chiudere.
DAVANTI SINISTRO
Lavorare come il davanti destro per i primi 4 ferri
f5- 3 rov,ripetere la sequenza tra virgolette del f 5 e finire con 11 rov.
lavorare come fatto per il davanti destro fino a 4 ferri sopra le coste della cintura.
prossimamente la traduzione della cuffia.
White Knitting Needles, 1 pair each Sizes 0 and 2.
White Crochet Hook, Size 1.
COAT
Gauge: 7 sts = 1 inch; 21 rows = 2 inches
Measurements—Chest 22 ins. Length from lower edge to back of neck 16 ins. Width of back at shoulders 8 ins. Sleeves—Width at underarm 8 ins.
Back—With size 2 needles, cast on 89 sts.
Pattern—Work stockinette st (p 1 row, k 1 row) for 4 rows. Begin first group of motifs.
5th pattern row (wrong side)—P 3, * yarn to back of work, slip next 3 sts to right hand needle, yarn to front, p 13 *; repeat between *’s, end last repeat p 3.
6th row—Knit. Repeat last 2 rows once, repeat 5th row again.
10th pattern row—K 4, * insert right hand needle under 3 loops of slipped rows and into next st on left hand needle, k the loops and st tog, k 15 *; repeat between *’s, end last repeat k 4. Work stockinette st for 4 rows. Begin 2nd group of motifs.
15th row—P 11, repeat between *’s of 5th pattern row, end last repeat p 11. Motifs of 2nd group are centered between motifs of first group.
16th row—Knit. Repeat last 2 rows once, repeat 15th row again.
20th row—K 12, repeat between *’s of 10th row, end last repeat k 12. Repeat these 20 rows for pattern. Work until 9 ¾ ins. from lower edge, or desired length to waistband, end with 3 rows of stockinette st above last group of motifs.
Dec. row—K 6, * k 2 tog, k 1; repeat from * 25 times, k 5 (63 sts). Change to size 0 needles. Work ribbing.
First row—K 1, * p 1, k 1; repeat from * to end.
2nd row—P 1, * k 1, p 1; repeat from * to end. Repeat these 2 rows for 1 in., end on right side. With size 2 needles, work pattern as follows: work stockinette st for 4 rows.
5th row—P 6, repeat between *’s of 5th pattern row, end last repeat p 6. Continue pattern until 1 ¾ ins. above ribbing.
Armholes—Bind off 3 sts at beginning of next 2 rows for underarm. Continue pattern on 57 sts until 3 ½ ins. above underarm, end with 4 rows above last group of motifs. Bind off.
Right Front—With size 2 needles, cast on 65 sts. Work 4 rows of stockinette st.
5th row—P 11, repeat between *’s of 5th pattern row of back, end last repeat p 3. Continue pattern until same length as back to dec. row.
Dec. row (right side)—K 3, * k 2 tog; repeat from * 19 times, k 2 (45 sts). With size 0 needles, work ribbing for same number of rows as on back waistband. With size 2 needles, work stockinette st for 4 rows.
5th row—P 7, repeat between *’s of 5th pattern row, end last repeat p 3. Work pattern for 1 ¾ ins., end with k row.
Armhole—Bind off 4 sts at beginning of next row for underarm. Continue pattern on 41 sts until 5 ins. above ribbing, end at front edge with 3 rows above last group of motifs.
Neck Shaping—Next row—Bind off 19 sts, * k 2 tog, k 1; repeat from * 6 times. Work stockinette st on 15 sts for 5 rows. Bind off.
Left Front—Work same as right front for 4 rows.
5th row—P 3, repeat between *’s of 5th pattern row, end last repeat p 11. Work to correspond to right front until 4 rows above waistband ribbing.
5th row—P 3, repeat between *’s of 5th pattern row, end last repeat p 7. Complete to correspond to right front.
Sleeves—With size 0 needles, cast on 38 sts. Work k 1, p 1, ribbing for 1 ½ ins.
Inc. row (right side)—* K 1, inc. 1 st in next st; repeat from * to end (57 sts). With size 2 needles, work stockinette st for 4 rows.
5th row—Same as 15th pattern row. Work even in pattern until 6 ¼ ins. above ribbing, or desired length to underarm, end with 4 rows above last group of motifs. Continuing pattern bind off 3 sts at beginning of next 2 rows for underarm. Bind off 2 sts at beginning of next 16 rows. Bind off 19 sts.
Collar—With size 0 needles, cast on 89 sts. Work k 1, p 1 ribbing for 1 ½ ins. Bind off ribbing.
Finishing—Sew seams, sewing 15 front shoulder sts to 15 sts at each side of back. Sew in sleeves with seam st center underarm. Join yarn at neck edge of left front. Working from right side, work 34 sc on left front to lower edge of waistband; continue sc down front, on lower edge and up right front to waistband, keeping work flat and working 3 sc at each corner; work 34 sc to right front neck edge. Fasten off. Join yarn in first sc, 1 sc in each sc (3 sc at corners) to lower edge of waistband on right front, * ch 3 for buttonloop, skip 1 st, 1 sc in each of next 7 sc; repeat from * 3 times, ch 3, skip 1, 1 sc in last st. Fasten off. Work 1 row sc from right side on short ends of collar. Steam collar, stretching bound-off edge to 15 ins. and holding neck edge in to 10 ins. Sew collar to neck edge of coat. Steam coat. Sew seam binding to wrong side of shoulder inserts, holding shoulder in to 2 ¼ ins.
CAP-14 ½ inches
Gauge: 7 sts = 1 inch; 10 rows = 1 inch
With size 2 needles, cast on 203 sts.
First row (wrong side)—P 1, * k 1, p 1; repeat from * to end.
2nd row—* K 1, p 1 *; repeat between *’s 23 times, slip, k and pass, k 1 (mark for seam st), k 2 tog, p 1, repeat between *’s 48 times, slip, k and pass, k 1 (mark for seam st), k 2 tog, ** p 1, k 1; repeat from ** to end (199 sts).
3rd row—* Work ribbing to within 2 sts of seam st; slip, k and pass, p 1 (seam st), k 2 tog; repeat from * once, work ribbing to end (195 sts).
4th row—* Work ribbing to within 2 sts of seam st; slip, k and pass, k 1 (seam st), k 2 tog; repeat from * once; work ribbing to end (191 sts). Repeat 3rd and 4th rows 11 times (103 sts).
27th row (wrong side)—* Work ribbing to within 1 st of seam st, p 3; repeat from * once; work ribbing to end.
28th row—* Work ribbing to within 2 sts of seam st, p 2 tog, k 1, p 2 tog; repeat from * once, work ribbing to end (99 sts).
29th row—Work even.
30th row—Same as 4th row (95 sts). Repeat last 4 rows 11 times (7 sts).
75th row (wrong side)—P 3, k 1, p 33.
76th row—K 1, slip, k and pass, p 1, k 2 tog, k 1 (5 sts). Break yarn, leaving an 18 in. end. Steam. Draw yarn through 5 sts on needle, draw up tight, fasten; sew edges together (center back).
Neckband and Tie Strings—With size 0 needles, cast on 11 sts. Work ribbing for 28 ins. Bind off. Leaving an 8 in. end free at left side and a 10 in,. end at right side for tie strings, sew 10 ins. on edge of band to neck edge.


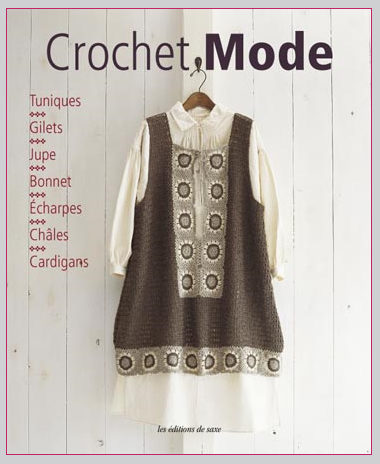 Sapete cosè questo?è un libro di modelli all’uncinetto GIAPPONESI, tradotto in francese, qui il