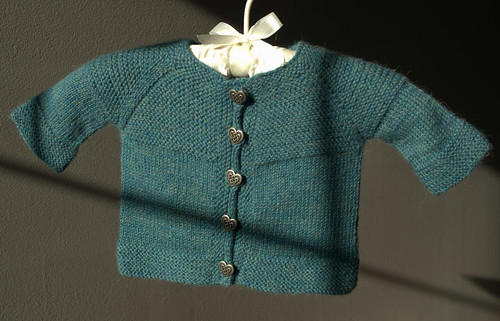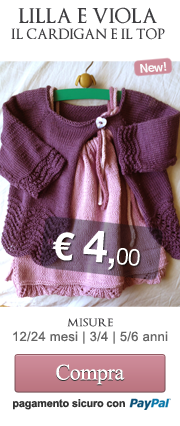
.: Lilla koftan!.
E’ un “top down” cioè si inizia a lavorare dall’alto e si finisce..in basso!( metaforicamente!).
la lavorazione top down è una delle mie preferite: alla fine del lavoro ci sono solo le cuciture dei sottobraccia, e nemmeno quelle se lavorate le maniche con i ferri circolari,ha una grandissima vestibilità, basta aumentare o diminuire gli aumenti ai raglan, ci vuole solo un po’ d’attenzione all’inizio, ma poi il lavoro va avanti da solo.
Questa è una spiegazione “liberamente “tratta da quella originale, che comunque trovate più in basso, prima perchè ho trovato un errore nell’originale e poi ho aggiunto delle misure , grazie al fatto che il topdown si presta a facili trasformazioni.
Gli aumenti lungo i ferri dello sprone,si fanno lavorando 2volte la stessa maglia oppure intercalari, come vi viene meglio, ma forse con il primo metodo si vede meno.
Gli aumenti dei raglan invece si fanno nelle maglia che precede e in quella che segue il segnapunto lavorando 2 volte la m.
Si inizia a lavorare dal collo.
Asole-iniziando dal 3° ferro e ogni 12 ferri, lavorare fino ad avere 5 m sul ferro, lav 2 diritti assieme, 1 gettato, 3 diritti.
SPIEGAZIONE
Montare 70 m con i ferri 4 e lavorare a legaccio per 6 ferri ( ricordarsi delle asole) poi, sempre lavorando a legaccio, distribuire al 7° ferro 15 aumenti lungo tutto il ferro = 85 maglie
ferro dall’ 8 al 12- a legaccio
ferro 13-fare 15 aumenti lungo il ferro=100 m.
ferri 14-18 a legaccio
ferro 19-aumentare 15 m lungo il ferro=115 m.
ferri 20-24 a legaccio
ferro 25 mettere i segnapunti:18dir, 1 segnapunto,21 dir,1 seg,37 dir,1 seg,21 dir, 1 seg,18 diritti.
Continuare a lav a m rasata
Il bordo si ottiene lavorando a lagaccio le prime e ultime 6 m di ogni ferro, ricordarsi di fare le asole, sul bordo del davanti destro per una bambina.
ferro 26 al rovescio
ferro 27-aumenti: ” lavorare a dir fino a una m prima del segno, lavorare 2 volte questa m, passare i segno sul f di destra e lav 2v la m successiva ” ripetere questa sequenza per tutto il ferro fino alle ultime 6m che si lavoreranno a legaccio
ferro 28-al rov(ricordarsi dei bordi a legaccio)
ripetere i ferri 27-28 per altre 7 volte (9-11-13)=179m (195-211-227)
terminati gli aumenti,dividere le m dal corpo:
Lav le prime 26m(-28-30-32) del davanti destro, poi le successive 37m(41-45-49) della manica destra, girare il ferro lasciando in sospeso (passarle su una lunga spilla)le m che restano,lavorare solo sulle m della manica lasciando in attesa anche le m del davanti destro e lavorare per 1o cm(12-14-16) e terminare con 11 a legaccio.Chiudere al rovescio del lavoro lavorando diritto
Se volete che la manica si restringa verso il polso, diminuite una m ai lati del ferro, all’interno di 2m per 3/4 volte distribuite durante la lavorazione.
Tagliare il filo e tornare a lavorare le 53m del dietro(57-61-65) e le altre m della seconda manica che termireremo cme la prima.
terminata anche la seconda manica, terminiamo con le m del davanti sinistro , e a questo punto avremo sul ferro solo le m del corpo.
Se si vuole un modello più svasato mettere un segno ai fianchi e fare un aumento ogni 4/6 ferri ai lati lavorando 2 volte la m che precede e quella che segue la m ai lati.(mettere 1 segno)
lavorare 17 ferri a m rasata (20-24-28) poi altri 9 ferri a legaccio e al decimo chiudere, sul rovescio del lavoro lavorando diritto.
Chiudere i sottobraccia e attaccare i bottoni
Grazie Petra,
Una nuova versione in bianco bordato di rosso
Versione in inglese
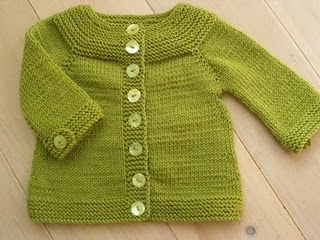
illa koftan (The Little Cardigan) This is a simple top-down childrens/toddlers cardigan.
Buttonholes: starting on row 3 and then every 12th row (ok if you wish to do it differently). You can do button holes in a lot of diffrent ways but this is how I do it; Knit until you have 5 stitches left on the left needle, knit 2 together, yarn over, knit 3.
Increases: I’m doing twisted wraps/yarn overs – do a yarn over and then knit it in the back loop to make it twisted. That closes the hole made by the yo (yarn over).
Cast on 70 stitches
Row 1-6: Garter stitches (don’t forget the button hole)
Row 7: Increase 15 stitches evenly distributed (85 stitches)
Row 8-12: Garter stitches
Row 13: Increase 15 stitches evenly distributed (100 stitches)
Row 14-18: Garter stitches
Row 19: Increase15 stitches evenly distributed (115 stitches)
Row 20-24: Garter stitches
Row 25: Place markers accordingly – knit 18 stitches, place marker, knit 21 stitches, place marker, knit 37 stitches, place marker, knit 21 stitches, place marker, knit 18 stitches.
Continue the work in stockinette stitch. The button band is knitted with 6 garter stitches in the beginning and the end of each row.
Row 26: Purl
Row 27: Time to do the increases – *knit to marker, make 1, slip marker, knit 1, make 1*.
Reapeat from *-*
Row 28: Purl
Row 29-38: Repeat row 27-28, 5 times.
Row 39-46: Make increases (just like row 27) on rows 41 and 45. (171 stitches)
Row 47: Divide the stitches like this – knit 25 stitches (left front panel), put 35 stitches on scrap yarn (sleeve), knit 51 stitches (back), put 35 stitches on scrap yarn (sleeve), knit remaining 25 stitches (right front panel).
If you want the cardi to be A-shaped, make increases every 4th row on the sides, m1 on both sides of the side center stitch. Please place one marker on each side of both side center stitches.
Row 48-65: Stockinette stitch
Row 66-75: Garter stitches
Row 76: Bind off
Sleeves: Pick up the stitches from the scrap yarn, knit stockinette for 21 rows and then garter for 11 rows. Bind off on wrong side (purl row).
Sew up the sleeve and the hole under the arm.
Sew in buttons – done!
Read Full Post »
 Ferri 3e 2,5